There’s something about a perfectly layered dessert that just draws you in. 7 layer bars—also called “magic bars”—are one of those beloved treats that combine flavors and textures in the best way possible. With a blend of gooey sweetness and satisfying crunch, each bite feels like a tiny bit of magic. But what exactly goes into making these layered bars, and how can you personalize them for any occasion? Let’s explore how to create the ultimate batch of 7 layer bars, from traditional recipes to creative twists!
Table of Contents
What Are 7 Layer Bars?
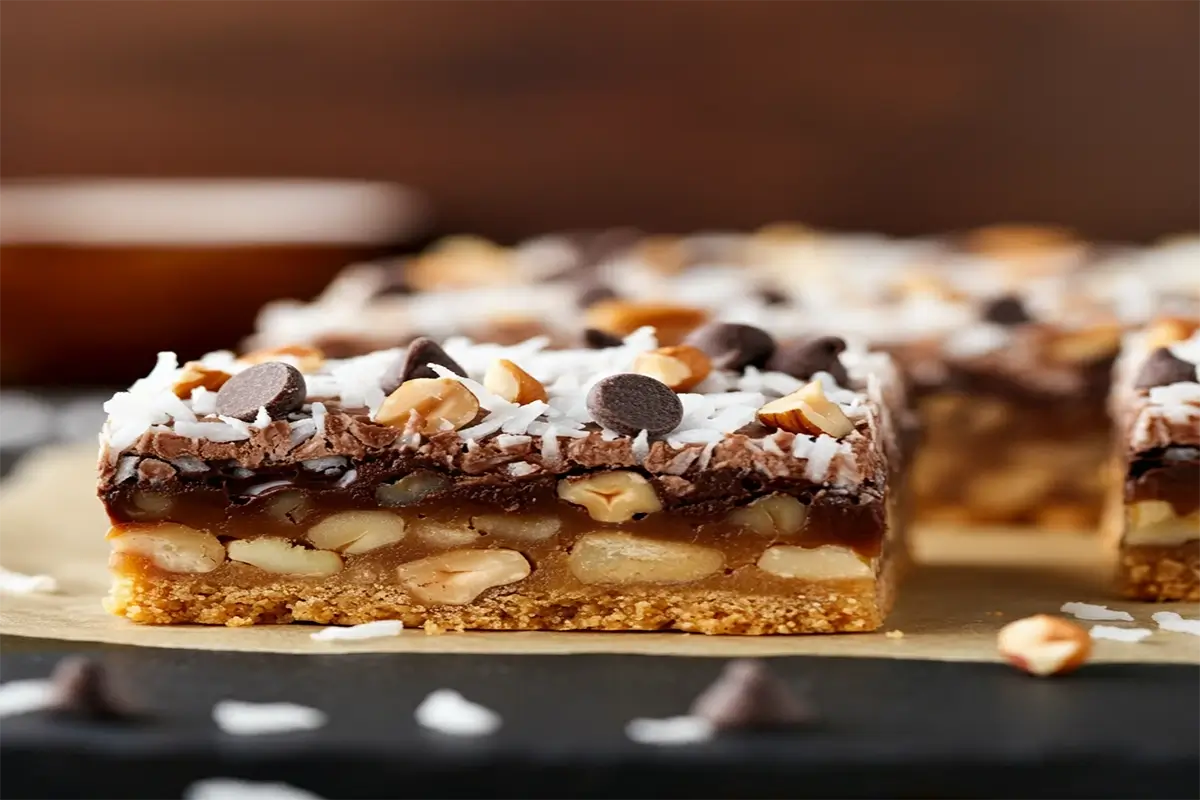
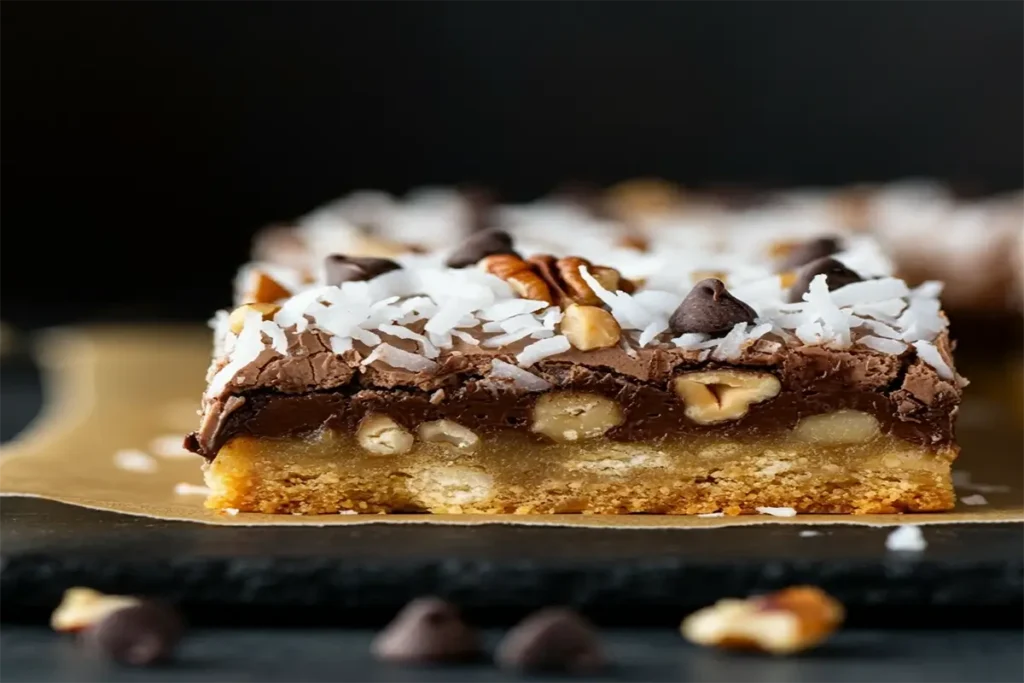
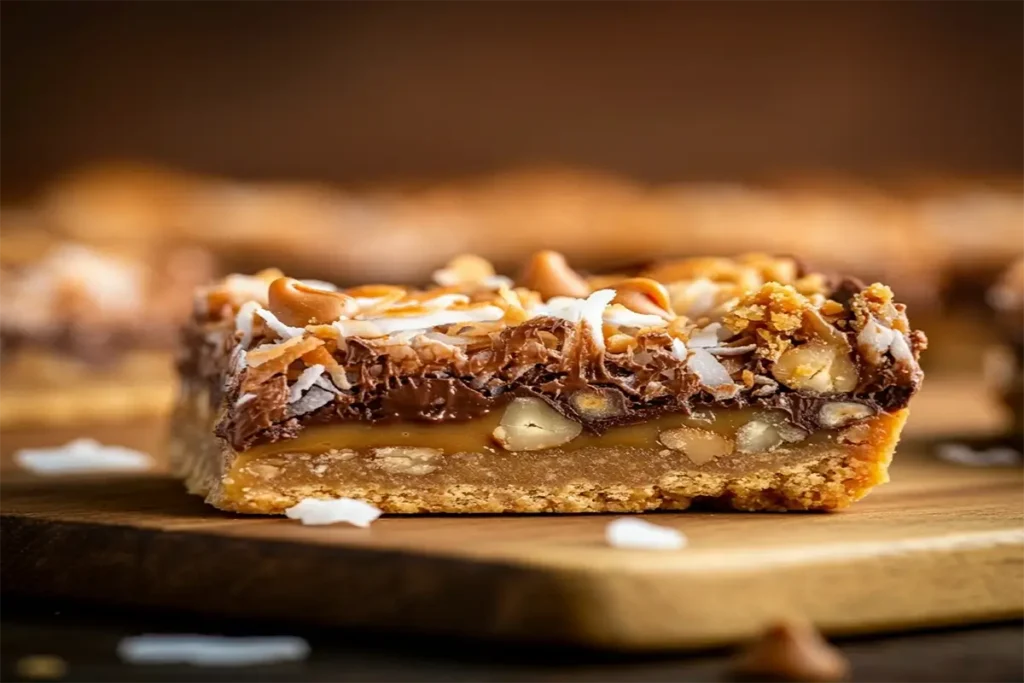
7 layer bars are a dessert that stands out because of its simplicity and taste. This layered bar consists of seven specific ingredients stacked one on top of another, forming a deliciously gooey, crunchy treat. Often called “magic bars,” these treats require no fancy kitchen skills or baking experience to make. They’ve earned a special place in households as a go-to for parties, potlucks, and family gatherings—and they’re always a crowd-pleaser.
Why 7 Layer Bars Are a Hit
One of the best things about 7 layer bars is their universal appeal. The mix of flavors and textures—crunchy, chewy, sweet, and a touch of saltiness—has something for everyone. Each bite is a different experience, and they’re perfect for various events: holidays, casual gatherings, or just a sweet treat on a regular day. Additionally, because they’re made with common pantry ingredients, they’re easy to whip up on short notice.
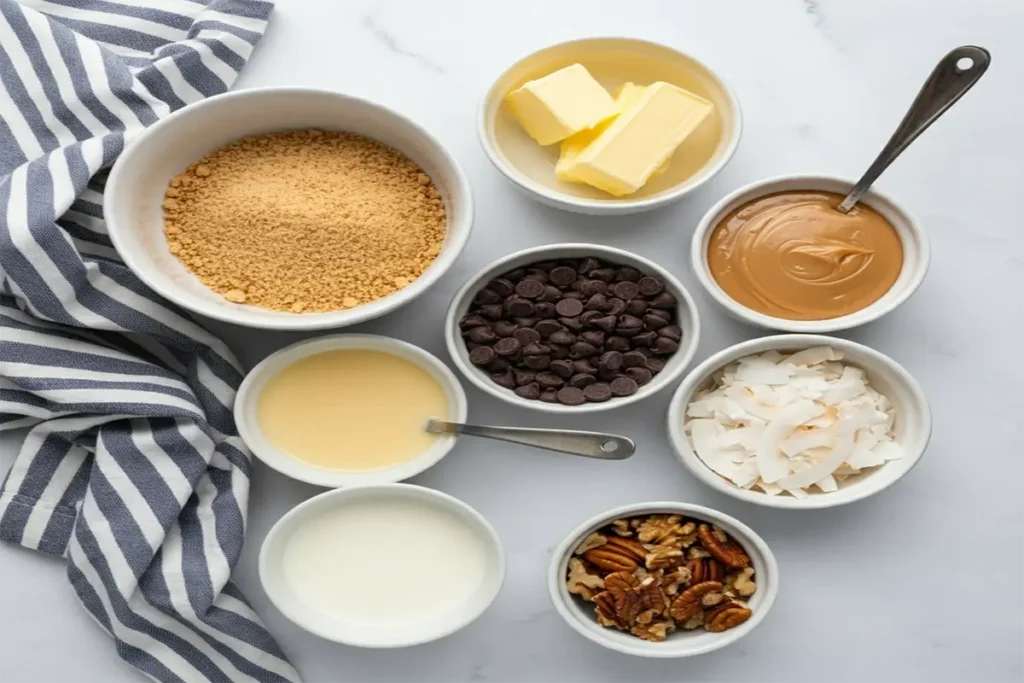
Ingredients for Classic seven layer bars
To make a batch of classic 7 layer bars, you’ll need seven simple ingredients. Here’s a breakdown of each one:
| Ingredient | Measurement |
|---|---|
| Graham cracker crumbs | 1 ½ cups |
| Melted butter | ½ cup |
| Sweetened condensed milk | 1 can (14 oz) |
| Chocolate chips | 1 cup |
| Butterscotch chips | 1 cup |
| Shredded coconut | 1 cup |
| Chopped nuts (walnuts/pecans) | 1 cup |
Layer Breakdown
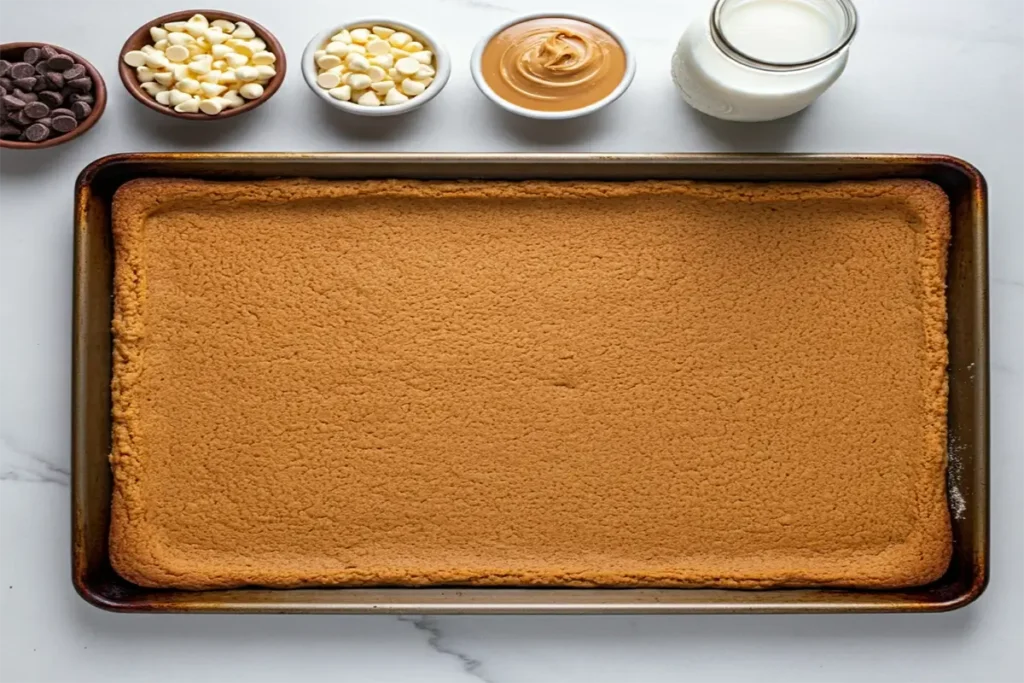
- Graham Cracker Crust: The graham cracker crumbs act as the foundation for your bars. When mixed with melted butter, it creates a solid, slightly crumbly base that holds the other layers.
- Condensed Milk: Sweetened condensed milk is poured over the crust, binding the layers together and adding a creamy sweetness.
- Chocolate Chips: These are a must for chocolate lovers and add richness to each bite.
- Butterscotch Chips: Butterscotch chips add a touch of caramel flavor that balances the chocolate.
- Coconut Flakes: Shredded coconut lends a chewy texture and a hint of tropical flavor.
- Chopped Nuts: Walnuts or pecans add crunch and a touch of earthiness, balancing out the sweetness.
Ingredient Substitutions
If you’re looking for variations, seven layer bars are incredibly versatile. Try these swaps:
- Gluten-Free: Use gluten-free graham crackers.
- Vegan: Swap butter for plant-based butter and use vegan chocolate chips.
- Low-Sugar: Substitute a lower-sugar condensed milk and reduce the chocolate/butterscotch chips.
How to Make 7 Layer Bars
Creating these layered bars is easy, requiring no advanced skills. Here’s a step-by-step guide to assembling and baking them:
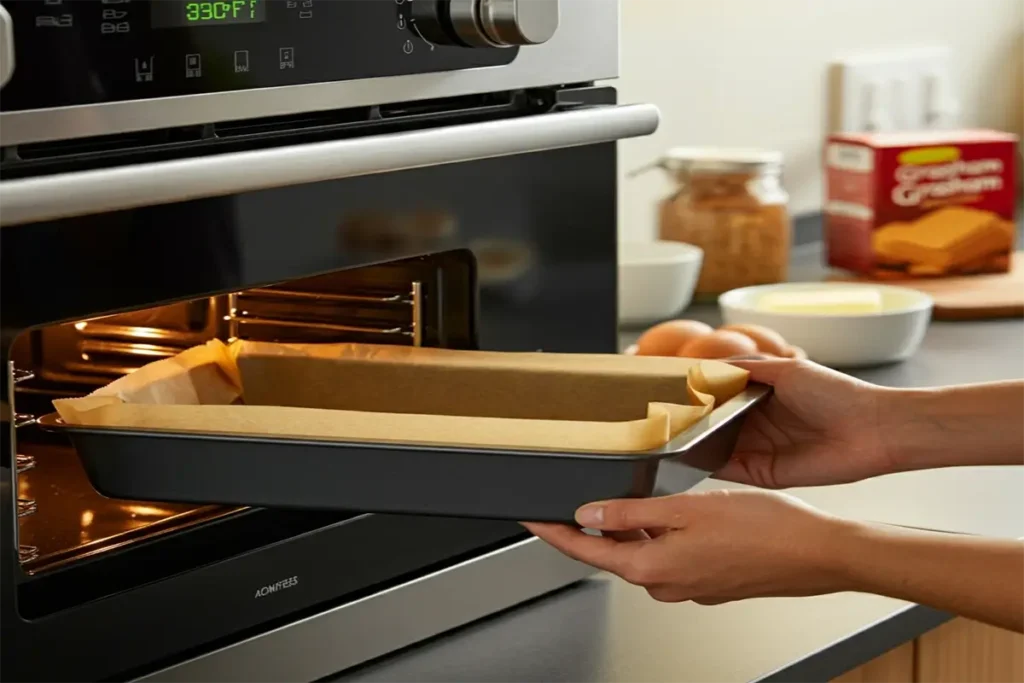
Preheat and Prep:
Preheat your oven to 350°F (175°C). Line a baking pan with parchment paper, making it easier to remove the bars once they’re baked.
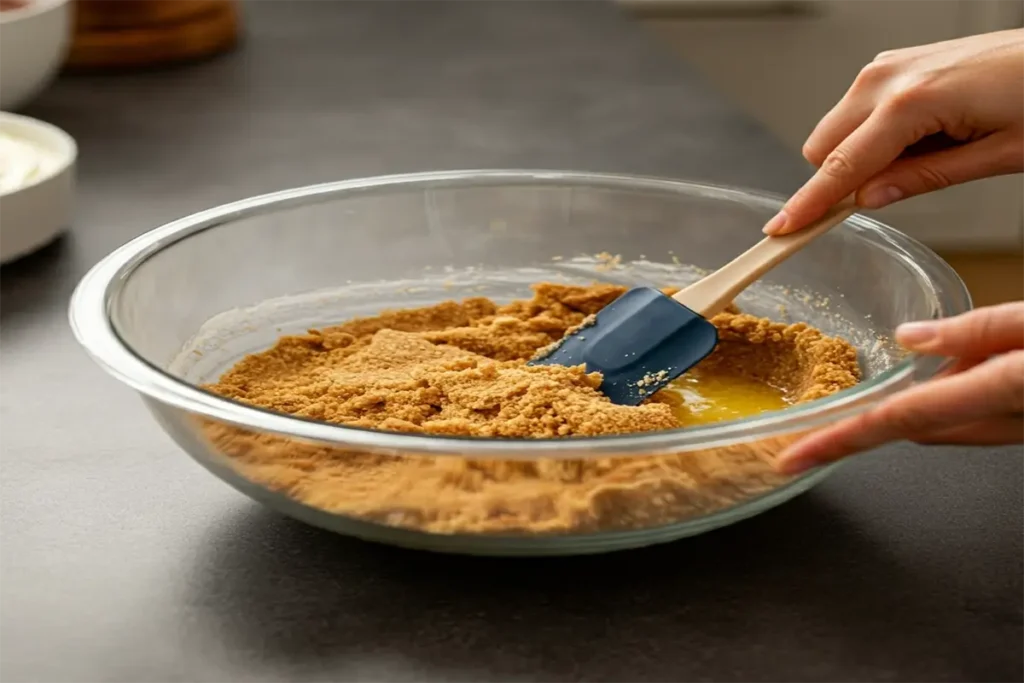
Make the Crust:
Combine graham cracker crumbs with melted butter, pressing the mixture firmly into the pan to form a solid base.


Layer Condensed Milk:
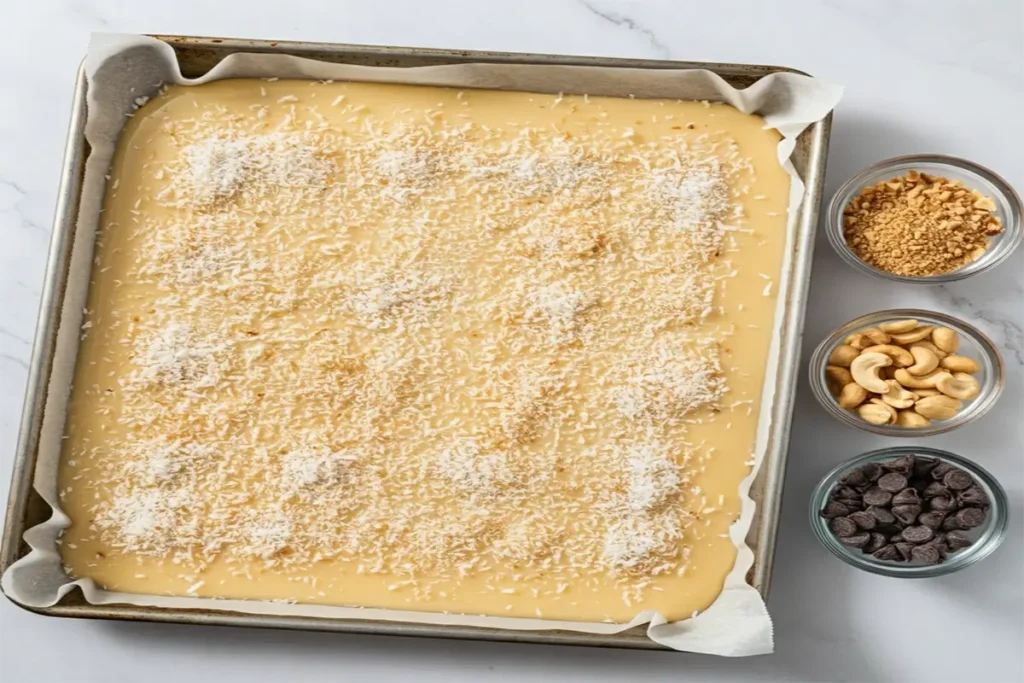
Pour sweetened condensed milk evenly over the graham cracker crust. It will seep through the layers as it bakes, creating a gooey texture.
Add Chips and Coconut:
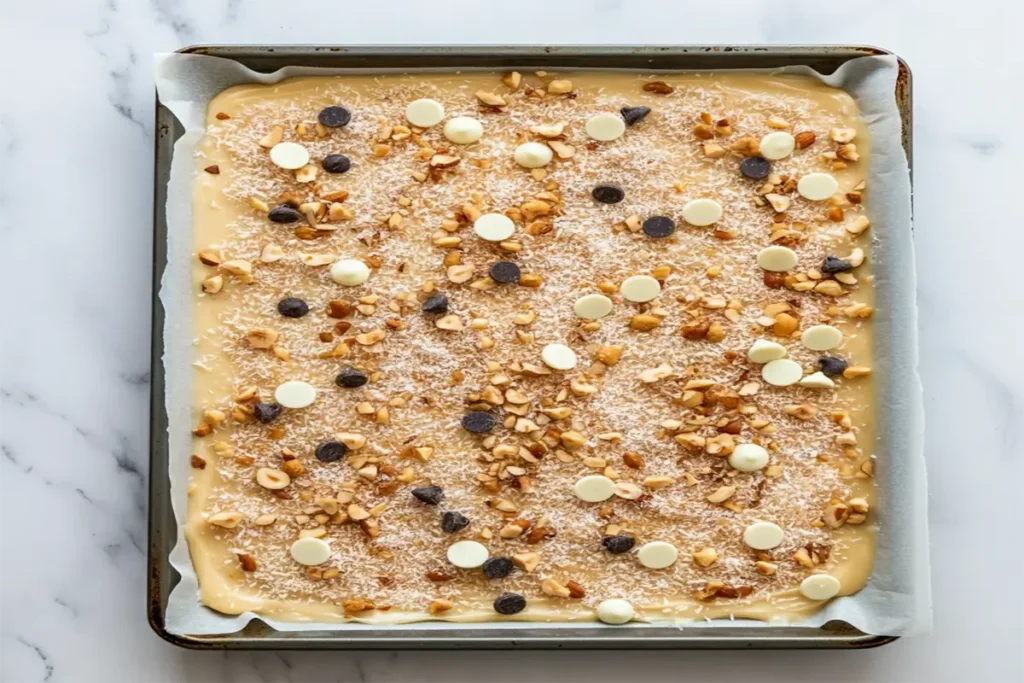
Sprinkle chocolate chips, butterscotch chips, and coconut flakes evenly over the condensed milk layer.
Top with Nuts:
Add chopped nuts over the top layer.
Bake:
Place in the oven and bake for about 25–30 minutes, or until the edges are golden and the bars are set.
Cool and Cut:
Allow the bars to cool before cutting them into squares to get clean edges and prevent crumbling.

Tips for Perfect Bars
- Even Distribution: To ensure every bite has all the layers, spread each ingredient evenly across the pan.
- Press the Crust: Press down on the graham cracker crust firmly with a flat spatula or the back of a spoon.
- Let Them Cool Completely: This helps the layers set, making it easier to cut without breaking apart.
Why 7 Layer Bars Are So Addictive
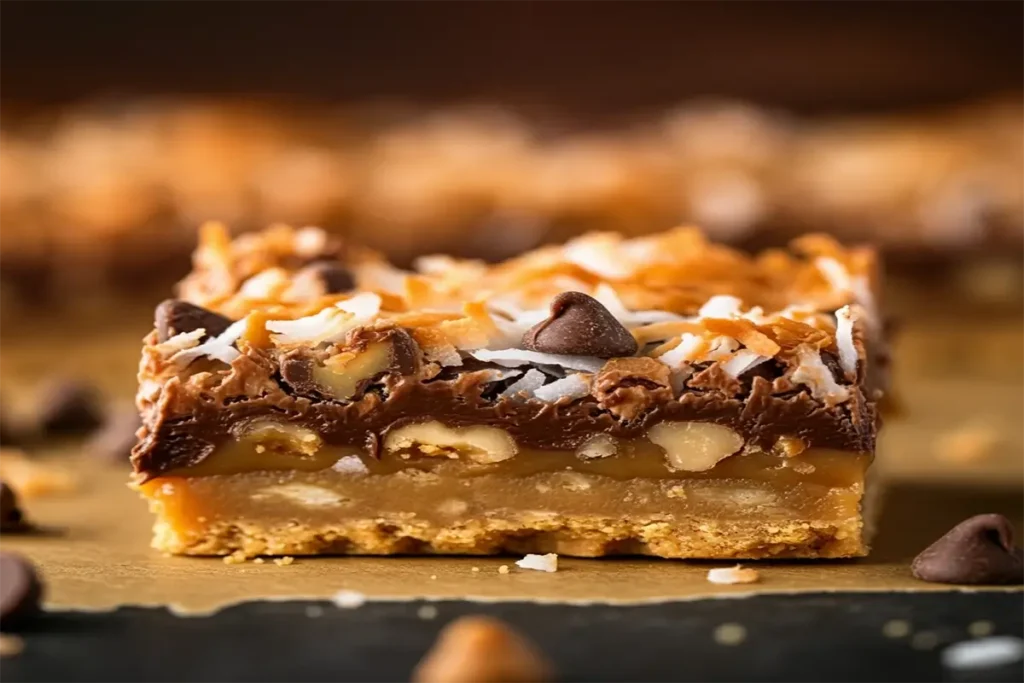
One of the reasons seven layer bars are so loved is because they blend flavors and textures perfectly. The soft chocolate chips melt into the chewy coconut, while the crunchy nuts balance the sweetness, creating a rich and satisfying dessert experience.
A Texture Lover’s Dream
Each layer adds its own texture: the graham cracker crust is crumbly, the condensed milk creates a gooey binding, the chips add richness, and the nuts bring the crunch. This balance makes every bite unique, giving you that satisfying feeling of multiple flavors working together.
Fun Variations for Different Occasions
Want to put a twist on the classic recipe? Here are some creative takes on seven layer bars to match the season or occasion:
Gluten-Free and Vegan 7 Layer Bars
For a vegan version, use dairy-free chocolate chips, plant-based condensed milk, and vegan graham crackers. For gluten-free bars, you can easily substitute gluten-free graham crackers without compromising taste.
Holiday-Themed 7 Layer Bars
- Winter Holidays: Add peppermint chips or red and green sprinkles for a festive look.
- Halloween: Top with candy corn or orange and black sprinkles.
- Easter: Try using pastel-colored candies or coconut-dyed with food coloring.
Healthier 7 Layer Bars
To make a lighter version, swap in lower-calorie options:
- Use dark chocolate chips and unsweetened coconut flakes.
- Try almond flour for a gluten-free crust.
- Limit condensed milk or use a sugar-free option.
Kid-Friendly 7 Layer Bars
For a child-friendly treat, reduce the nuts or replace them with mini marshmallows. Kids will love the extra gooeyness and sweetness!
Storage and Serving Tips for 7 Layer Bars
To keep your bars fresh and flavorful, follow these storage tips:
How to Store seven layer bars
- Room Temperature: Store in an airtight container at room temperature for up to 3 days.
- Refrigerator: Extend freshness by refrigerating them for up to a week.
- Freezing: For longer storage, freeze them in a sealed container for up to 2 months. When ready to serve, let them thaw at room temperature.

Creative Serving Ideas
- Serve with Ice Cream: Place a bar alongside a scoop of vanilla ice cream for an extra indulgent dessert.
- Top with Whipped Cream: Add a dollop of whipped cream and a sprinkle of coconut or chopped nuts.
- Shape Variations: Cut into squares, triangles, or even bite-sized cubes to serve as finger food for parties.
How to Make Sweetened Condensed Milk at Home
Creating sweetened condensed milk from scratch is surprisingly easy and requires just two simple ingredients. This homemade version has the same creamy sweetness and rich texture as store-bought, ideal for desserts like 7 layer bars. Here’s how to make it yourself!
Ingredients You’ll Need
For about 1 cup of sweetened condensed milk:
- 1 cup whole milk (or substitute with half-and-half for extra richness)
- 1/3 cup granulated sugar
Step-by-Step Instructions
Step 1: Begin by Combining Milk and Sugar
Start by pouring the milk and sugar into a medium saucepan. Stir them together well before turning on the heat to ensure the sugar starts dissolving right away.
Step 2: Dissolve Sugar Over Medium Heat
Set the pan over medium heat and stir continuously until the sugar fully dissolves. This should only take a few minutes but is important to prevent the sugar from settling at the bottom and creating a gritty texture.
Step 3: Reduce to a Low Simmer
Once the sugar has dissolved, reduce the heat to low. Let the mixture simmer slowly, stirring occasionally to prevent any sticking or burning. Over the next 30–45 minutes, you’ll notice the liquid reducing in volume and thickening.
Step 4: Watch for the Right Consistency
The milk should eventually reduce by about half and develop a slightly syrupy, rich texture. The final consistency should be similar to traditional sweetened condensed milk. It may thicken slightly more as it cools, so aim for a smooth, pourable consistency in the pan.
Step 5: Cool and Store
Remove the pan from the heat and allow the mixture to cool completely. Transfer your sweetened condensed milk to a clean glass jar or airtight container. Store it in the refrigerator for up to a week, stirring gently before each use.
Tips for Success
- Use Whole Milk for Best Results: Whole milk provides the creamiest texture, though other milks can work if adjusted for consistency.
- Watch the Temperature: Keep it on low heat to avoid scorching and ensure even thickening.
- Vegan or Dairy-Free Option: Substitute the milk with coconut milk and adjust cooking time as needed for a dairy-free alternative.
Frequently Asked Questions about 7 Layer Bars
What are the layers in 7 layer bars?
The classic 7 layer bar recipe includes graham cracker crumbs, melted butter, sweetened condensed milk, chocolate chips, butterscotch chips, coconut flakes, and chopped nuts.
Can I make 7 layer bars without nuts?
Yes, simply omit the nuts if you have a nut allergy or prefer a nut-free treat. You can add extra chocolate or butterscotch chips to keep the layers balanced.
Are 7 layer bars gluten-free?
Traditional 7 layer bars are not gluten-free because they use graham crackers. However, you can easily make a gluten-free version by using gluten-free graham cracker crumbs.
Can I freeze 7 layer bars?
Yes, these bars freeze well! To freeze, wrap them tightly and store in an airtight container. They’ll keep for up to 2 months in the freezer.
Conclusion
Making 7 layer bars is more than a baking task; it’s a way to create memorable, indulgent treats that everyone will love. From the classic recipe to fun, seasonal variations, these bars offer endless possibilities for customization. Next time you need a simple yet crowd-pleasing dessert, you know exactly what to bake.
Ready to make magic in your kitchen? Try these 7 layer bars and let us know your favorite twist! Share your creations with friends and family, and enjoy every sweet, crunchy bite!
