There’s something magical about crafting pasta from scratch – the feel of soft dough between your fingers, the rhythm of rolling each piece by hand, and the aroma of fresh pasta filling your kitchen. Cavatelli, a traditional Italian pasta, brings comfort and nostalgia in every bite. Whether it reminds you of family gatherings or ignites your passion for cooking, this simple yet delicious recipe will transport you straight to the heart of Italy. Let’s dive into the easiest way to create authentic cavatelli at home, perfect for any day of the week!
Table of Contents
What is Cavatelli Pasta?
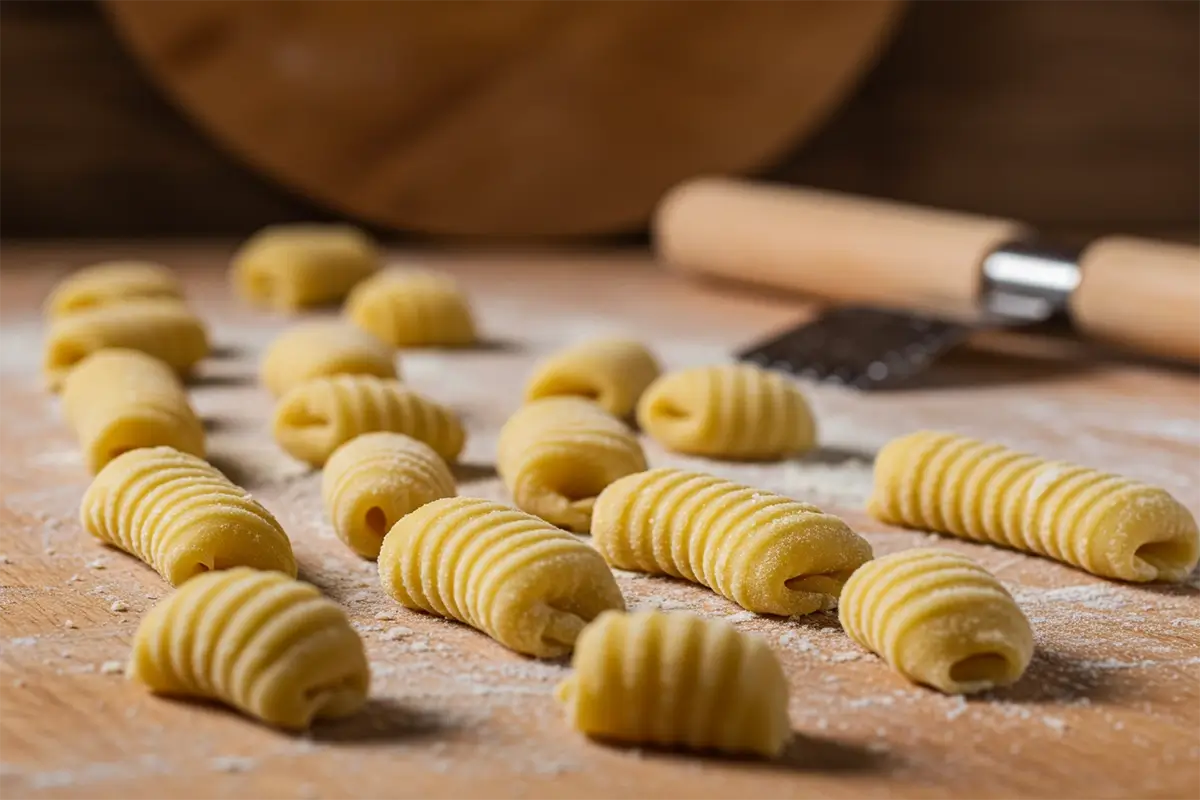
Cavatelli is a traditional Italian pasta known for its distinctive shell-like shape and ridged texture. This iconic pasta originates from Southern Italy, with strong roots in regions such as Puglia, Molise, and Calabria. Often described as resembling miniature hot dog buns, cavatelli’s unique form allows it to cradle sauces, enhancing each bite with rich flavor.
What makes cavatelli particularly special is its simplicity. Made with just three basic ingredients – semolina flour, water, and salt – it reflects the essence of Italian cooking: turning humble pantry staples into culinary treasures. Unlike egg-based pastas from Northern Italy, cavatelli is dairy-free, making it a great option for vegans or those with dietary restrictions.
Traditionally, cavatelli was hand-shaped by rolling the dough into long ropes and cutting it into small pieces. Each piece is then pressed with a thumb or dragged across a gnocchi board to achieve its signature curve and ridges. This rustic, hands-on approach is not only rewarding but also a wonderful way to connect with authentic Italian culinary traditions.
Cavatelli is incredibly versatile, pairing beautifully with a variety of sauces – from hearty ragùs to light, vegetable-based toppings. Whether tossed with classic tomato sauce, served alongside sautéed greens, or mixed with creamy ricotta, this pasta adapts effortlessly to different flavors.
Why Cavatelli Stands Out:
- Texture: The dough’s density and shape allow cavatelli to hold sauces exceptionally well, ensuring each bite is flavorful.
- Versatility: It pairs wonderfully with light vegetable sauces, hearty meat sauces, or even a drizzle of olive oil and herbs.
- Cultural Significance: Making cavatelli by hand is often a family activity, passed down through generations. It’s a way to celebrate heritage and enjoy homemade comfort food.
Difference from Other Pasta:
Cavatelli vs. Orecchiette: Orecchiette is rounder and flatter, while cavatelli has an elongated shape.
Cavatelli vs. Gnocchi: While gnocchi is made with potatoes, cavatelli relies on flour and water, giving it a firmer bite.
Ingredients for Homemade Cavatelli
The beauty of cavatelli lies in its simplicity. Here’s what you’ll need to make it from scratch:
| Ingredient | Quantity |
|---|---|
| Semolina flour | 2 cups |
| All-purpose flour (optional) | 1 cup |
| Warm water | ¾ cup |
| Salt | 1 tsp |
Ingredient Breakdown:
- Semolina Flour: Provides a firm, slightly chewy texture perfect for cavatelli. It’s commonly used in Southern Italian pasta recipes.
- All-Purpose Flour: Optional but can make the dough softer. It can be used as a substitute if semolina is unavailable.
- Water: Warm water helps create a pliable dough that’s easier to shape.
- Salt: Enhances flavor and strengthens the dough structure.
Substitutions:
Vegan Option: The base recipe is naturally vegan, but adding plant-based ricotta can create softer cavatelli.
Gluten Free: Use a blend of gluten free all-purpose flour and xanthan gum to mimic the elasticity of semolina.
How to Make Cavatelli – In-Depth Step by Step Guide
1. Preparing the Dough – The Foundation of Perfect Cavatelli
Crafting cavatelli dough is an art in itself. A perfect dough isn’t too sticky or too dry – it holds together but still feels soft to the touch.
1.1 Mix the Flours
- Why Mix Flours? Semolina flour brings structure, while all-purpose flour softens the dough slightly. If you prefer firmer cavatelli, stick to 100% semolina.
- Alternative Blends:
- For softer pasta: Use a 50:50 mix of semolina and all-purpose flour.
- For gluten free: Swap with a 1:1 gluten free flour blend or chickpea flour.
- For extra flavor: Add 2 tbsp of finely ground herbs (like basil or rosemary) to the flour mix.
1.2 Add Water Gradually
- Start with ¾ cup warm water, but don’t add it all at once. Slowly trickle in while stirring the flour with your hands or a wooden spoon.
- Feel the Dough: Stop adding water when the dough starts coming together but isn’t overly sticky. Too much water makes rolling difficult.
- If the dough crumbles, add a teaspoon of water at a time. If sticky, sprinkle more semolina until manageable.
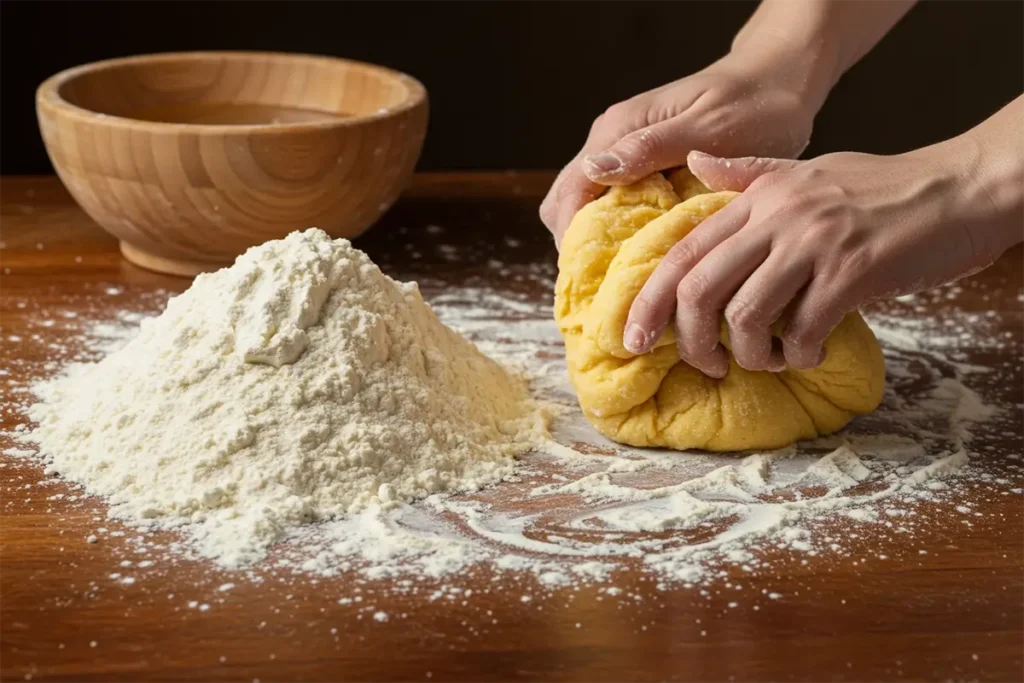
1.3 Knead the Dough
- Why Knead? Kneading activates the gluten, which gives cavatelli its chewy texture.
- Pro Tip: Use the heel of your hand, pushing the dough away from you and folding it back. Repeat for 8-10 minutes until smooth.
- Signs the Dough is Ready: It should spring back slightly when pressed.
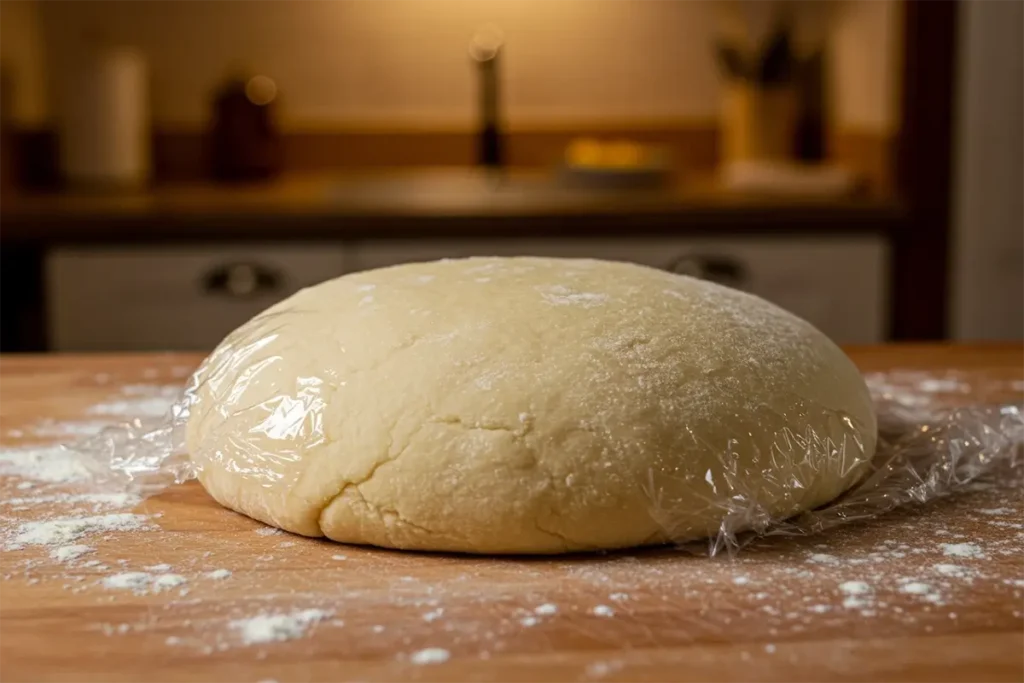
1.4 Rest the Dough
- Resting Time: At least 30 minutes. This allows the flour to fully absorb the water, creating smoother pasta.
- Cover the Dough: Use plastic wrap or a damp cloth to prevent it from drying out.
2. Shaping the Cavatelli – The Signature Curl
Shaping cavatelli is where the magic happens. You don’t need special tools – just your hands or a fork.
2.1 Roll the Dough
- After resting, cut the dough into quarters. Take one piece and roll it into a long rope, about ½ inch thick.
- Keep It Consistent: The thickness of the rope determines the size of your cavatelli. Aim for even thickness to ensure uniform cooking.
2.2 Cut and Shape

- Slice the rope into 1-inch segments. These will form the individual pasta pieces.
- The Thumb Technique: Place your thumb in the center of the dough piece and gently press while rolling the dough towards you. This creates a curled, ridged shape perfect for holding sauces.
- Optional Tools: Use a gnocchi board or fork to achieve pronounced ridges. This is especially useful for sauces that need to cling to the pasta.
2.3 Flour and Set Aside
- Lightly dust shaped cavatelli with semolina to prevent sticking. Lay them flat on a floured baking sheet until ready to cook.
3. Cooking the Cavatelli – Timing is Key
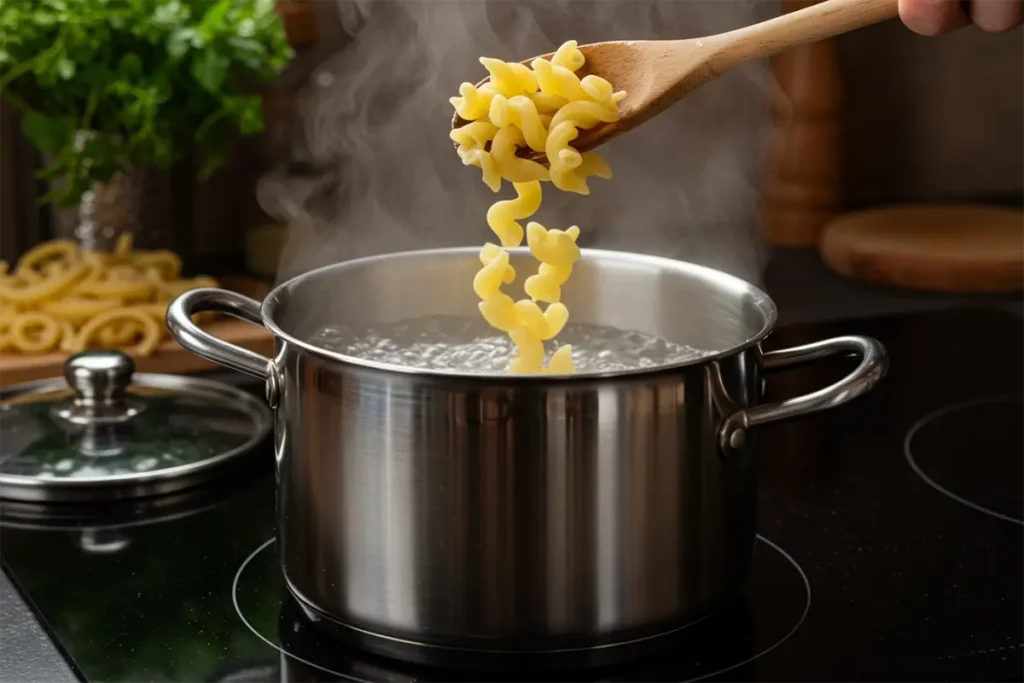
Fresh pasta cooks quickly. A few minutes in boiling water is all you need.
3.1 Boil Water
- Bring a large pot of water to a vigorous boil. Add a generous pinch of salt – this seasons the pasta as it cooks.
3.2 Cook the Pasta
- Drop the cavatelli into boiling water. Stir gently to prevent them from clumping.
- Cooking Time: 3-4 minutes or until the pasta floats to the surface. This signals that they are ready.
- Taste Test: If the cavatelli feels too firm, let it cook for another 30 seconds.
3.3 Drain and Serve
Drain the pasta immediately. Toss with olive oil or sauce right away to prevent sticking.
Advanced Tips for Perfect Cavatelli
Flavored Dough: Infuse the dough with finely chopped spinach, beetroot puree, or turmeric for vibrant colored pasta.
Hydration Balance: If the dough feels stiff after resting, knead with wet hands to introduce moisture without making it too sticky.
Batch Cooking: Make double portions and freeze half for quick future meals.
Sauce Pairing – Elevate Your Cavatelli
Cavatelli is the ultimate canvas for bold, rich sauces. Here’s a closer look cavatelli perfectly. To make it:
- Sauté garlic in olive oil until fragrant, then add blanched broccoli rabe and a pinch of red pepper flakes for a bit of heat.
- Toss the cooked cavatelli into the pan, coating them in the garlic oil.
- Pro Tip: A dash of lemon juice brightens the entire dish.
- Tomato Basil Sauce:
- This simple, classic combination is perfect for letting the cavatelli shine.
- Sauté onions and garlic in olive oil, then add crushed tomatoes and simmer until thickened.
- Stir in fresh basil at the end to retain its aromatic flavor.
- Pro Tip: For an extra creamy texture, stir in a little heavy cream or vegan cream towards the end.
- Creamy Ricotta and Spinach Sauce:
- Blend ricotta with cooked spinach, a bit of grated Parmesan, and a pinch of nutmeg for a rich, comforting sauce.
- Warm this mixture on the stovetop before tossing in your freshly cooked cavatelli.
- Pro Tip: Add some toasted pine nuts for a nutty crunch.
- Pesto Sauce:
- Basil pesto is the traditional go-to, but don’t hesitate to experiment with arugula, spinach, or sun-dried tomatoes for variety.
- Toss cavatelli in pesto made from fresh basil, garlic, Parmesan, pine nuts, and olive oil for a fragrant and fresh dish.
- Pro Tip: Add a bit of lemon zest for extra freshness.
- Bolognese Sauce:
- If you’re craving something hearty, a rich meat-based Bolognese sauce will pair beautifully with cavatelli.
- Prepare a slow-cooked meat sauce with beef or pork, adding carrots, celery, and onions for depth of flavor.
- Pro Tip: Let the sauce simmer for at least an hour to intensify the flavors.
Frequently Asked Questions (FAQs)
Q: Can I make gluten-free cavatelli?
Absolutely! Gluten-free cavatelli can be made by replacing semolina flour with gluten-free flour blends or rice flour. You can also use chickpea flour or cornmeal to mimic the texture of semolina. Just ensure that the dough has enough moisture to hold together well.
Q: Can I store cavatelli dough for later?
Yes! You can store uncooked cavatelli dough in the fridge for up to 3 days. Wrap it tightly in plastic wrap to prevent it from drying out. Alternatively, you can freeze it for up to a month. Thaw it in the fridge before shaping and cooking.
Q: How can I store leftover cooked cavatelli?
Store leftover cavatelli in an airtight container in the fridge for up to 3 days. When reheating, sauté it in a bit of olive oil or reheat with your sauce. To store cooked cavatelli for longer, freeze it in an airtight container or bag for up to 2 months.
Q: What’s the secret to perfect cavatelli texture?
The key to perfect cavatelli lies in kneading the dough properly and resting it before shaping. Semolina flour gives the pasta its signature chewy texture, while resting helps the dough relax and become easier to roll. Don’t skip the boiling step either – make sure your water is at a full rolling boil for the best result!
Q: Can I use a pasta machine to make cavatelli?
While a pasta machine is ideal for rolling dough, it’s not necessary for making cavatelli. The traditional hand-rolled method is part of what makes cavatelli so special. However, if you prefer, you can use a pasta machine to roll out the dough into thin sheets before cutting it into 1-inch pieces and shaping with a fork or gnocchi board.
Conclusion – Bringing Authentic Italy to Your Kitchen
Making cavatelli at home is an incredibly rewarding experience. From the simple ingredients to the handmade shaping process, each step brings you closer to creating an authentic Italian dish that rivals any restaurant. Whether you’re serving it with a rich tomato sauce, a creamy ricotta blend, or a light pesto, homemade cavatelli will make every meal feel like an indulgent celebration.
Now that you know how to make cavatelli, it’s time to bring a piece of Southern Italy into your kitchen. Gather your ingredients, follow the steps, and savor the joy of homemade pasta. Who knows – this may just become your new favorite go-to dish!
Call to Action:
Try making cavatelli for your next family dinner or special occasion, and don’t forget to share your results with us! Tag your cavatelli creations on social media with #CavatelliAtHome for a chance to be featured in our next post. Happy cooking!