Introduction:
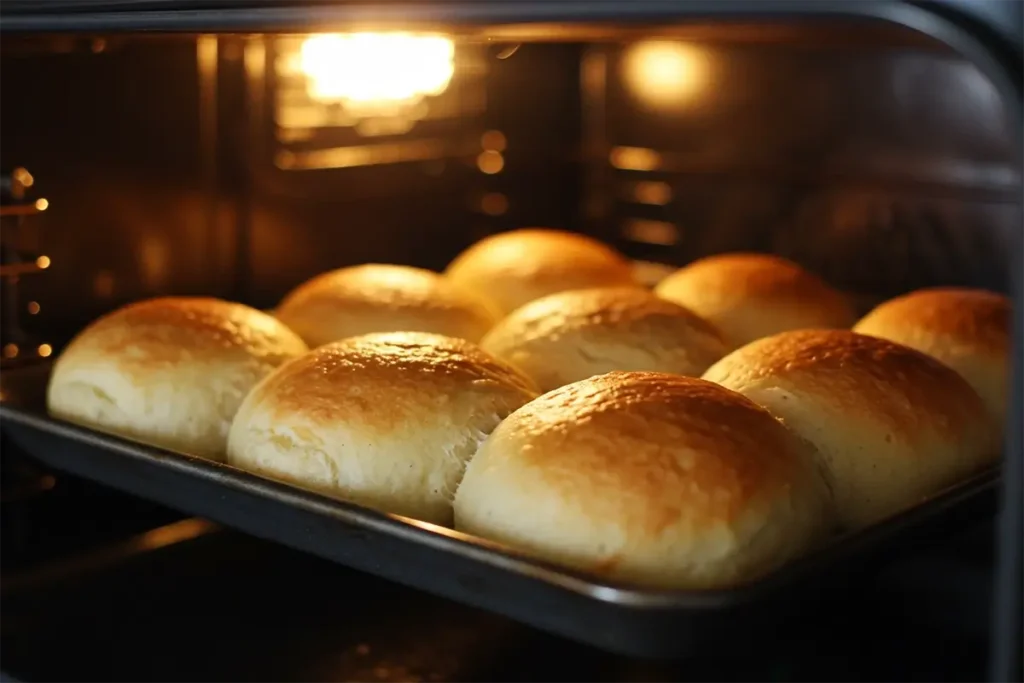
There’s something magical about pulling a batch of warm, golden rolls from the oven – the kind that fills your kitchen with the sweet, buttery aroma that instantly transports you to family gatherings and holiday feasts. But if you follow a gluten free lifestyle, those moments can sometimes feel out of reach. I remember the first time I sat at a holiday table and had to pass the bread basket without taking one. It felt like I was missing out on more than just a roll – I was missing out on tradition, comfort, and connection.
That’s why I knew I had to find a way to bring that soft, sweet, and fluffy goodness back into my life – without the gluten. After some trial and error, I finally discovered the secret to making gluten free Hawaiian rolls that are just as pillowy and delicious as the original. Now, I’m excited to share this recipe with you, so no one at your table has to miss out.
Let’s dive in and create something that brings everyone together – because everyone deserves to savor that first warm bite.
Table of Contents
Why You’ll Love These Gluten Free Hawaiian Rolls
There’s a reason Hawaiian rolls are a staple at family dinners, holiday feasts, and casual gatherings – their irresistible sweetness, soft texture, and golden, buttery tops make them hard to resist. But for those of us who need to follow a gluten free lifestyle, finding a good substitute can feel like chasing a dream. That’s where this recipe comes in, offering all the qualities you love about classic Hawaiian rolls, but without the gluten.
Soft, Fluffy, and Sweet – Perfect for Any Meal
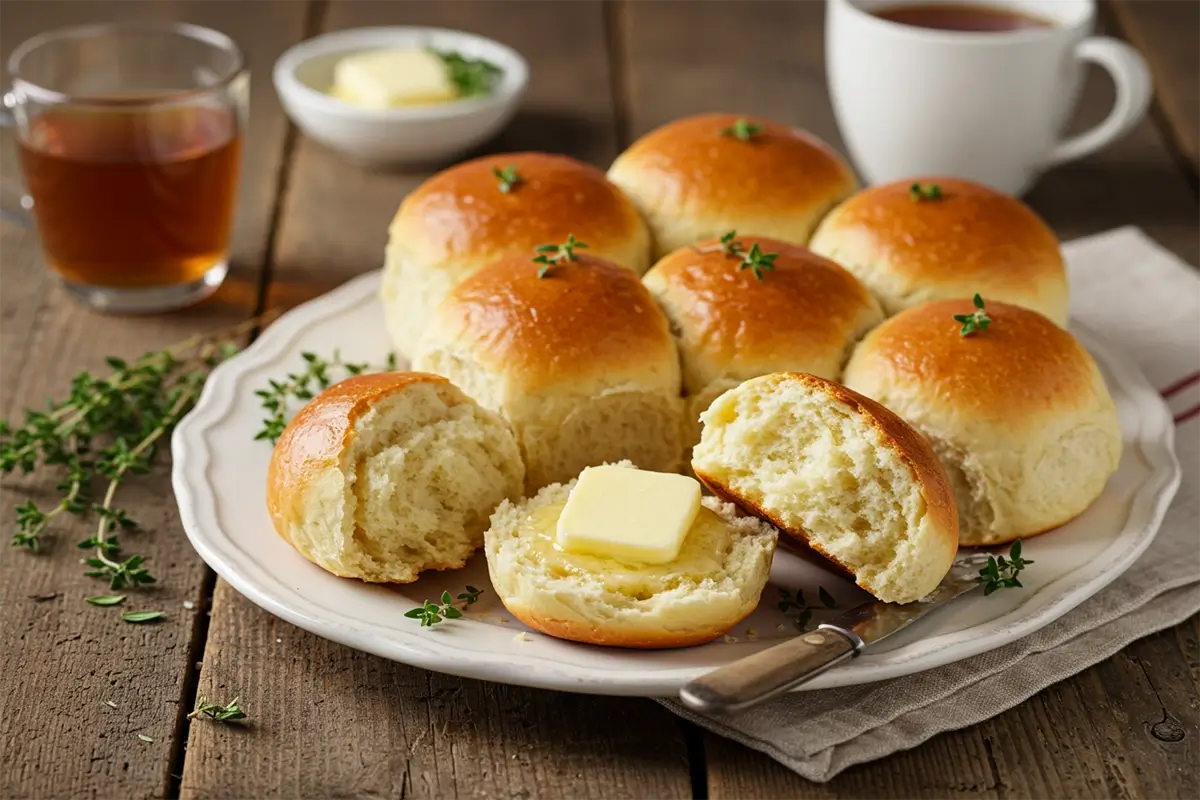
These rolls are tender, with a light and fluffy interior that melts in your mouth. The subtle sweetness, enhanced by pineapple juice and honey, makes them versatile enough to pair with savory dishes or enjoy on their own with a pat of butter. Whether you’re serving them alongside a hearty stew or slicing them in half for sliders, these rolls rise to the occasion – literally!
Simple, Gluten Free Ingredients
One of the best parts about this recipe is how accessible it is. With basic gluten free pantry staples like a quality flour blend, eggs, and yeast, you won’t need to search high and low for rare ingredients. This recipe keeps things simple, proving that gluten free baking doesn’t have to be complicated to yield delicious results.
Great for Holidays, Dinners, or Sandwiches
Whether you’re hosting Thanksgiving dinner or just want to add a little sweetness to your weeknight meals, these gluten free Hawaiian rolls are the perfect sidekick. They add a touch of comfort and indulgence to any spread. Plus, they make excellent sandwich or slider buns, perfect for leftover ham or turkey.
Customizable to Fit Your Dietary Needs
Need dairy free or vegan options? No problem. This recipe can easily be adapted by swapping out the butter for a plant-based alternative and using an egg replacer. The result? Still soft, still sweet, and just as satisfying.
These gluten free Hawaiian rolls prove that dietary restrictions don’t have to mean sacrificing flavor or tradition. Each bite is a reminder that comfort food can be inclusive and just as delightful for everyone at the table.
Ingredients Needed for Gluten Free Hawaiian Rolls
The charm of this recipe is in its simplicity – no need for fancy ingredients or complex techniques. With just a few pantry staples and a couple of key components, you can create soft, sweet, and fluffy gluten free Hawaiian rolls that taste just as delicious as traditional ones. Let’s break down what you’ll need and why each ingredient plays an essential role.
Dry Ingredients
| Ingredient | Purpose | Notes |
|---|---|---|
| Gluten Free Flour Blend | The foundation for the dough. Provides structure and texture. | Use a high-quality blend with xanthan gum for best results. King Arthur, Cup4Cup, or Bob’s Red Mill work well. |
| Tapioca Starch | Adds elasticity and chewiness to the rolls. | Enhances the soft texture, mimicking traditional wheat flour. |
| Granulated Sugar | Feeds the yeast and adds sweetness to the dough. | White sugar works best, but cane sugar can be used. |
| Instant Yeast | Helps the dough rise and creates fluffy rolls. | Instant yeast activates quickly. If using active dry yeast, proof it first. |
| Salt | Balances the sweetness and enhances flavor. | Fine sea salt or table salt is preferred. |
Wet Ingredients
| Ingredient | Purpose | Notes |
|---|---|---|
| Pineapple Juice | Adds signature sweetness and flavor to the dough. | Use 100% pure pineapple juice, no sugar added. |
| Eggs | Adds richness and helps with structure. | Large eggs at room temperature work best. |
| Butter (or Dairy Free Alt.) | Provides moisture and creates a soft texture. | For dairy free, use vegan butter or coconut oil. |
| Milk (or Dairy Free Alt.) | Enhances softness and richness. | Almond, oat, or coconut milk works well. |
| Honey | Adds additional sweetness and flavor. | Optional, but gives the rolls a beautiful glaze. |
Optional Additions
| Ingredient | Purpose | Notes |
|---|---|---|
| Xanthan Gum (if needed) | Adds elasticity and prevents crumbly dough. | Check if your flour blend already contains it. |
| Egg Wash | Gives rolls a shiny, golden finish. | Mix 1 egg with 1 tbsp water for a glaze. |
| Honey Butter Glaze | Adds sweetness and a glossy finish after baking. | Brush on immediately after baking. |
Why These Ingredients Work
- Pineapple Juice is the secret to the distinct flavor of Hawaiian rolls, giving them their signature sweetness. It also adds acidity, which tenderizes the dough.
- Tapioca Starch works to improve the chewiness and flexibility of gluten free dough, preventing the rolls from becoming dense or crumbly.
- Eggs and Butter contribute to the soft, rich texture, while the yeast and sugar work together to give the rolls a beautiful rise and lightness.
By using this combination of ingredients, you’re ensuring the perfect balance of flavor, texture, and fluffiness – all without gluten.
Step-by-Step Guide to Making Gluten Free Hawaiian Rolls
Making gluten free Hawaiian rolls at home is easier than you might think, especially with the right ingredients and a little patience. This step-by-step guide will walk you through each stage, ensuring that your rolls come out soft, fluffy, and bursting with that signature sweetness. Grab your apron and let’s get baking!
1. Preparing the Dough
The first step to creating the perfect gluten free Hawaiian rolls is making the dough. Because gluten free dough behaves differently than traditional dough, it’s important to follow these steps carefully.
Activate the Yeast:
Start by heating your pineapple juice and milk in a microwave or on the stovetop until they’re warm (but not too hot). You want it to be about 110°F (43°C) – too hot and it will kill the yeast; too cold and it won’t activate. Once it’s the right temperature, stir in the granulated sugar to feed the yeast, then sprinkle in the instant yeast. Let it sit for about 5-10 minutes. You should see it begin to foam and bubble – this means the yeast is alive and ready to go.
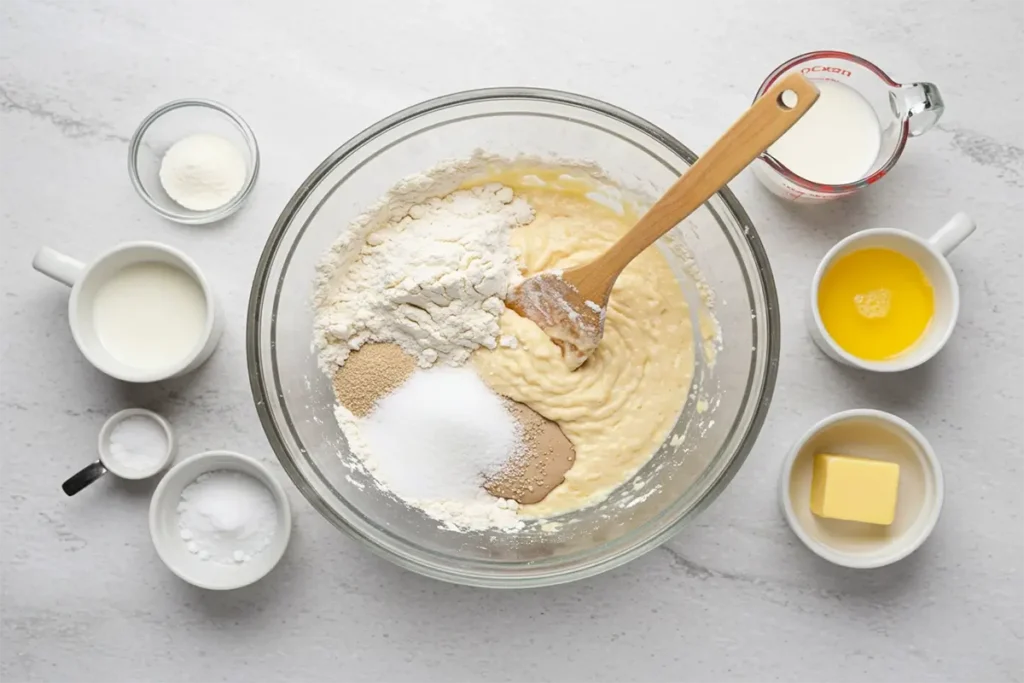
Combine Dry Ingredients:
In a separate bowl, whisk together the gluten free flour blend, tapioca starch, and salt. This ensures that the dry ingredients are evenly distributed before adding them to the wet mixture.
Mix Wet and Dry Ingredients:
Once the yeast mixture is foamy, add the butter (or dairy-free alternative) and eggs into the wet mixture. Stir to combine. Slowly add the dry ingredients, mixing with a spoon or hand mixer on low speed. As you mix, you’ll notice that the dough is a bit stickier than regular bread dough – that’s perfectly normal for gluten free dough!
Knead the Dough:
Unlike traditional dough, you don’t need to knead gluten free dough for long. Simply mix it until everything is fully incorporated. If you’re using a stand mixer, this should only take about 2-3 minutes on low speed. The dough should feel soft, elastic, and a little sticky but not runny.
2. Shaping the Rolls
Once the dough is ready, it’s time to shape it into individual rolls. This is where you get to envision those soft, golden rolls filling your bread basket!
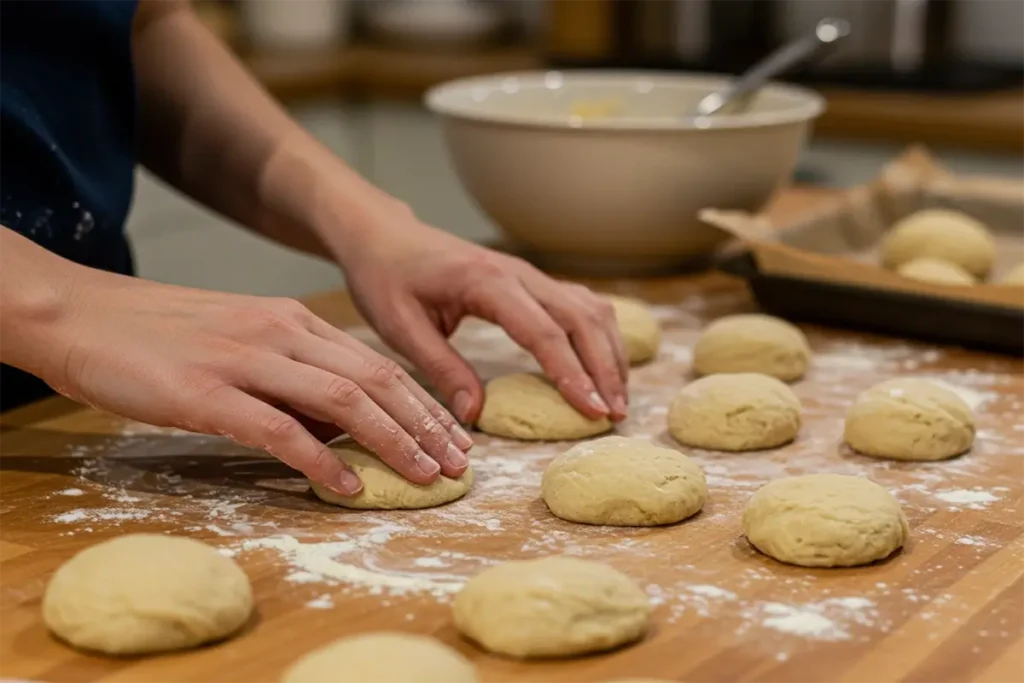
Grease Your Hands:
Because gluten free dough is stickier than traditional dough, it helps to grease your hands with a little butter or oil before handling it. This will make shaping the rolls much easier.
Divide the Dough:
Use a spoon to scoop out portions of dough, roughly the size of a golf ball. Roll each piece between your hands to form smooth balls. If you want to get fancy, you can make them slightly oval to resemble traditional Hawaiian rolls.
Arrange the Rolls:
Place the shaped rolls on a greased baking sheet or in a lined 9×13-inch baking dish, ensuring they’re close together but not touching. Gluten free rolls don’t rise quite as much as traditional rolls, so spacing them closely helps them rise to the perfect height.
3. Baking to Perfection
Now that your rolls are shaped, it’s time to let them rise and bake to a beautiful golden brown.
First Rise:
Cover the rolls with a clean kitchen towel and let them rise in a warm, draft-free area for about 30-45 minutes. You’ll notice that they won’t double in size like traditional dough, but they should puff up nicely. If your kitchen is cool, you can preheat the oven to 200°F (93°C), then turn it off and place the rolls inside to proof.
Preheat the Oven:
While your rolls are rising, preheat your oven to 375°F (190°C). This ensures that the rolls go straight into a hot oven for even baking.
Bake the Rolls:
Once your rolls have risen, place them in the oven and bake for 18-22 minutes or until golden brown on top. If you’re using an egg wash for extra shine, brush it on the rolls about 5 minutes before they’re done baking. The rolls should sound hollow when tapped on the bottom.
4. Finishing Touches
The final step is to make these rolls irresistible – and that’s by adding a sweet, glossy finish.
Honey Butter Glaze:
In a small bowl, mix together melted butter and honey. Brush this glaze generously over the warm rolls right after they come out of the oven. The sweetness of the honey combined with the richness of the butter gives the rolls that signature Hawaiian flavor.
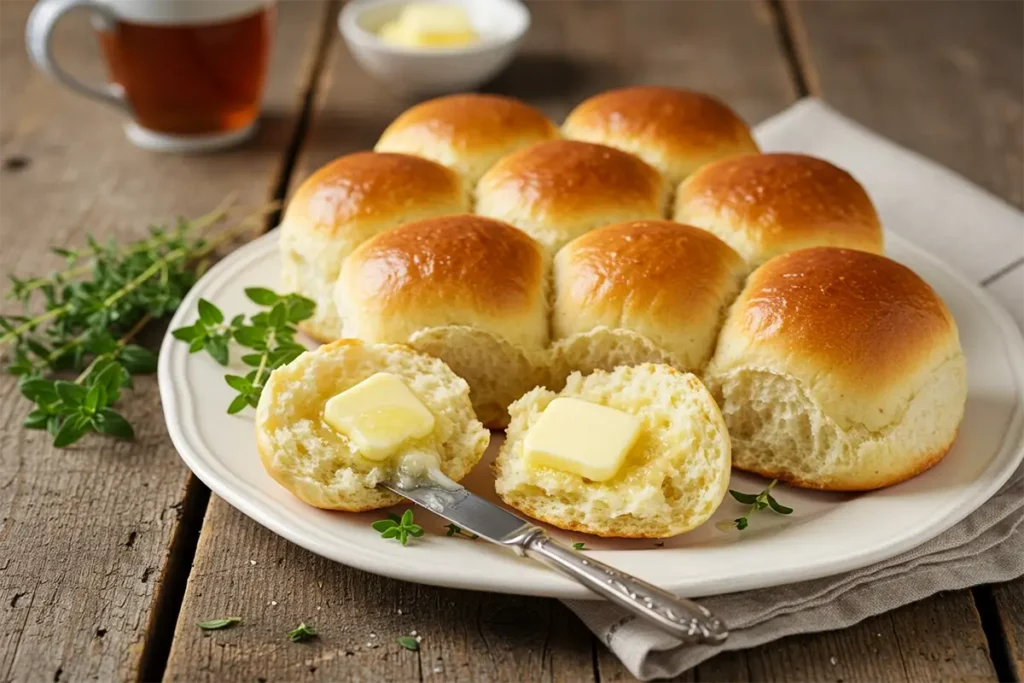
Cool and Serve:
Let the rolls cool for a few minutes, then serve them warm with a little extra butter, if desired. Enjoy these soft, sweet rolls with dinner, as a snack, or even for breakfast!
By following these simple steps, you’ll have homemade gluten free Hawaiian rolls that are just as soft, fluffy, and sweet as the traditional version. Whether it’s a weeknight dinner or a special occasion, these rolls will quickly become a favorite in your gluten free baking repertoire.
Tips for Perfect Gluten Free Hawaiian Rolls
Achieving the perfect gluten free Hawaiian rolls can feel like a challenge, but with a few helpful tips, you can ensure they turn out soft, fluffy, and delicious every time. Since gluten free dough behaves differently than traditional dough, it’s important to understand the unique characteristics of gluten free baking. Let’s dive into some expert tips to help you bake your best rolls yet.
1. Choose the Right Gluten Free Flour Blend
The key to soft and fluffy gluten free rolls is in the flour blend you use. Not all gluten free flours are created equal, and each one behaves differently. To get the best results, it’s essential to choose a high-quality gluten free flour blend designed for baking.
- Look for Blends with Xanthan Gum or Guar Gum: These are thickening agents that help hold the dough together and mimic the structure that gluten would normally provide.
- Avoid Single-Ingredient Flours: While coconut flour, almond flour, or rice flour can be used in some recipes, they typically don’t provide the elasticity needed for soft rolls. A pre-made blend of rice flour, potato starch, and tapioca starch works best.
If you’re using a blend without xanthan gum, consider adding 1 teaspoon per cup of flour to help with texture.
2. Don’t Skip the Proofing Process
Proofing the dough is essential in gluten free baking. While gluten free dough doesn’t rise as much as wheat dough, it still needs time to relax and expand. This process helps create the soft, airy texture that makes these rolls so irresistible.
- Find a Warm Spot: Yeast works best in a warm environment, so place your dough in a warm, draft-free spot to rise. If your kitchen is chilly, try preheating the oven to 200°F (93°C), turning it off, and then placing the dough inside to proof.
- Be Patient: Gluten free dough may take a little longer to rise compared to regular dough. If your dough has not doubled in size after the recommended time, give it some more time.
3. Avoid Over-Mixing or Over-Kneading
Unlike traditional bread dough, gluten free dough does not require long kneading. In fact, over-mixing can lead to a dense texture.
- Mix Until Just Combined: Once your wet and dry ingredients are incorporated, stop mixing. Gluten free dough doesn’t have the same structure as traditional dough, so it doesn’t benefit from long kneading. The dough should be sticky and slightly thick, but it will hold together nicely once shaped.
- Use a Stand Mixer or Hand Mixer: This will make the mixing process smoother, especially when dealing with gluten free flour, which tends to be clumpier.
4. Measure Your Ingredients Correctly
Accurate measurements are key in gluten free baking, especially when working with gluten free flour. Too much or too little flour can affect the texture of the rolls, resulting in a denser product or one that spreads too much.
- Use a Kitchen Scale: If possible, weigh your ingredients for more precision. One cup of gluten free flour can vary greatly in weight depending on how it’s scooped.
- Spoon and Level: If you’re using measuring cups, make sure to spoon the flour into the cup and level it off with a flat edge. Don’t pack the flour down, as it can lead to using too much.
5. Add Extra Moisture for Softness
Gluten free dough tends to be drier than regular dough, which can lead to rolls that are crumbly or hard. Adding the right amount of moisture ensures that your rolls remain soft and tender.
- Butter and Milk: The combination of butter (or dairy-free alternatives) and milk helps the dough stay moist and rich. You can also brush the rolls with additional melted butter or honey butter after baking to add moisture and shine.
- Pineapple Juice: Not only does it provide sweetness, but pineapple juice also helps retain moisture in the dough, contributing to a softer texture.
6. Know When the Rolls Are Done
It can be tricky to tell when gluten free rolls are fully baked, as they don’t brown as much as traditional rolls. Here are a few signs to look for:
- Golden Brown Top: The rolls should be golden and slightly crisp on top, but not overly dark.
- Hollow Sound: Gently tap the bottom of one of the rolls; if it sounds hollow, it’s done.
- Internal Temperature: For perfectly baked rolls, the internal temperature should be around 190°F (88°C). If you have a thermometer, this is the most foolproof way to check.
7. Store and Reheat Properly
To keep your gluten free Hawaiian rolls soft and fresh, proper storage is key.
- Store in an Airtight Container: Once the rolls have cooled, store them in an airtight container at room temperature for up to 3 days. If you want to keep them longer, freeze them!
- Reheat Gently: To reheat, wrap the rolls in a damp paper towel and microwave for 10-15 seconds. Alternatively, you can reheat them in the oven at 350°F (175°C) for about 5-10 minutes. The rolls will taste just as fresh as the day you made them.
By following these tips, you’ll ensure your gluten free Hawaiian rolls are light, fluffy, and full of the sweet, comforting flavor you love. With a little attention to detail, gluten free baking can be just as rewarding – and delicious – as traditional recipes. Enjoy the process, and most importantly, enjoy the rolls!
Serving and Pairing Ideas for Gluten Free Hawaiian Rolls
Gluten free Hawaiian rolls are not just delicious on their own – they’re versatile and can complement a wide variety of meals, adding that sweet and soft touch to any dish. Whether you’re serving them as a side or incorporating them into a main course, these rolls are sure to elevate your meal. Let’s explore some creative and mouthwatering ways to serve and pair your homemade rolls.
1. Serve as a Side Dish for Family Meals
The classic way to enjoy Hawaiian rolls is as a side dish with hearty meals. Their soft, slightly sweet flavor pairs well with savory main courses, adding a comforting element to your dinner table.
- Roast Chicken or Turkey: The light sweetness of Hawaiian rolls complements the savory flavors of roasted poultry, making them a perfect pairing for Sunday dinners or holiday feasts. Use them to soak up delicious gravies and sauces!
- Gluten Free Stews or Soups: These rolls are ideal for dipping into rich, hearty soups or stews. The pillowy texture soaks up broth and flavors, creating the ultimate comfort food experience.
- Grilled Meats: Whether it’s steak, grilled chicken, or pork, these rolls balance out the smoky, savory flavors of grilled meats with their sweet, tender texture.
2. Turn Them Into Sandwiches or Sliders
Gluten free Hawaiian rolls are perfect for making sandwiches or sliders, thanks to their soft, slightly sweet flavor and ideal size for handheld meals. Whether you’re preparing a snack, lunch, or dinner, these rolls can be filled with all sorts of fillings.
- Mini BBQ Pulled Pork Sliders: A sweet Hawaiian roll with tender pulled pork, tangy barbecue sauce, and a slice of pickles is an unbeatable combination. Add a bit of slaw for crunch and extra flavor.
- Turkey and Cranberry Sliders: For a holiday-inspired twist, fill your Hawaiian rolls with slices of turkey, a dollop of cranberry sauce, and a bit of stuffing. These sliders are perfect for after-Thanksgiving sandwiches.
- Vegan Chickpea Salad Sliders: For a plant-based option, create a chickpea salad using mashed chickpeas, vegan mayo, mustard, and fresh herbs. Serve on a gluten free Hawaiian roll for a tasty and filling sandwich alternative.
3. Use for Breakfast or Brunch
The soft and sweet nature of gluten free Hawaiian rolls makes them a delightful addition to any breakfast or brunch spread. You can serve them as they are or use them as a base for creative breakfast dishes.
- Breakfast Sandwiches: Toasted Hawaiian rolls are perfect for making breakfast sandwiches. Fill them with scrambled eggs, bacon, cheese, or your favorite breakfast fillings.
- French Toast: Slice your rolls into thick pieces and dip them in a cinnamon-vanilla egg mixture to make French toast. The sweetness of the rolls makes them extra indulgent.
- Butter and Jam: For a simple yet satisfying breakfast, warm up a roll, spread a little butter, and add a spoonful of your favorite fruit jam or preserves. It’s a quick, delicious option for those busy mornings.
4. Pair with Fresh Salads
If you’re looking for a lighter option, pairing gluten free Hawaiian rolls with a fresh salad can provide the perfect balance of flavors and textures. The sweetness of the rolls contrasts beautifully with the crispness of a salad, making this combo perfect for a light lunch or a starter.
- Crisp Caesar Salad: The rich and creamy flavors of a Caesar salad (with or without anchovies) pair wonderfully with the soft sweetness of the rolls. Use them to scoop up extra dressing or enjoy as a side.
- Mixed Green Salad with Vinaigrette: The tanginess of a vinaigrette dressing can balance out the sweetness of the rolls, creating a refreshing and satisfying meal. Add grilled chicken, nuts, or cheese for a more filling option.
- Cucumber and Tomato Salad: For a fresh and light salad, pair the rolls with cucumber, tomato, and red onion tossed in olive oil and lemon juice. The sweetness of the rolls complements the crispness and acidity of the salad.
5. Serve as an Appetizer or Snack
If you’re hosting a gathering or just need a snack, gluten free Hawaiian rolls can be transformed into fun appetizers or easy bites that everyone will love.
- Stuffed Rolls: Slice the rolls in half and stuff them with various fillings. For example, you can stuff them with cheese and herbs for a savory bite or with Nutella and berries for a sweet treat.
- Rolls with Dips: Cut the rolls into smaller pieces and serve them with dips like hummus, guacamole, or spinach artichoke dip. The soft texture of the rolls makes them perfect for dipping!
- Cheese Platter: Serve your rolls alongside a cheese platter for a luxurious snack. Choose cheeses that pair well with the sweet flavor of the rolls, such as sharp cheddar, brie, or goat cheese.
6. Pair with Drinks for a Well-Rounded Meal
For the perfect meal, consider pairing your gluten free Hawaiian rolls with drinks that complement their sweet, rich flavor. Whether you’re enjoying them with a casual meal or hosting guests, the right drink can enhance the experience.
- Iced Tea or Lemonade: The light sweetness of the rolls pairs beautifully with a refreshing iced tea or lemonade. Add a sprig of mint for extra flair.
- White Wine or Champagne: If you’re serving these rolls at a more formal gathering, a crisp white wine like Sauvignon Blanc or a glass of bubbly champagne will balance the sweetness of the rolls and add a touch of elegance to the meal.
- Coffee or Hot Tea: For breakfast or brunch, pair your rolls with a hot cup of coffee or tea. The rich flavors of coffee, especially dark roast or flavored blends, are a great match for the soft sweetness of the rolls.
By exploring these various serving and pairing ideas, you can make gluten free Hawaiian rolls an essential part of almost any meal. Their versatility allows you to enjoy them in a variety of ways, whether you’re hosting a gathering, enjoying a simple dinner, or treating yourself to something sweet for breakfast. With endless possibilities, these rolls will quickly become a favorite in your kitchen.
FAQ: Gluten Free Hawaiian Rolls
1. Can I make these gluten free Hawaiian rolls dairy-free?
Yes! You can easily make these gluten free Hawaiian rolls dairy-free by substituting the butter with dairy-free butter or coconut oil and using a plant-based milk such as almond milk or coconut milk. These adjustments will still give you the soft, sweet texture that makes these rolls so delicious.
2. How do I store leftover gluten free Hawaiian rolls?
To store leftover gluten free Hawaiian rolls, place them in an airtight container at room temperature for up to 3 days. For longer storage, you can freeze the rolls. Just wrap them in plastic wrap or aluminum foil, and place them in a freezer-safe bag. When ready to enjoy, thaw them at room temperature or reheat them in the oven for a few minutes.
3. Can I freeze gluten free Hawaiian rolls?
Yes, you can freeze gluten free Hawaiian rolls! After baking, allow the rolls to cool completely, then wrap them tightly in plastic wrap and place them in a freezer-safe bag. It will stay fresh in the freezer for about 2 to 3 months. To thaw, leave them at room temperature or warm them in the oven for a fresh-from-the-bakery taste.
4. Why did my gluten free Hawaiian rolls turn out dense?
If your gluten free Hawaiian rolls turned out dense, there could be a few reasons. Ensure that you’re using the right type of gluten free flour blend with the correct ratio of starches and gums. Also, make sure to follow the proofing process carefully, as yeast may need more time to activate and the dough to rise. Additionally, avoid over-mixing or over-kneading the dough.
5. Can I use a different type of sweetener for gluten free Hawaiian rolls?
Yes, you can substitute the granulated sugar in the recipe with other sweeteners like honey, maple syrup, or coconut sugar. However, keep in mind that these alternatives might slightly change the texture or flavor of the rolls. You may need to adjust the wet ingredients to compensate for the liquid sweeteners.
6. How do I get my gluten free Hawaiian rolls to rise better?
To help your gluten free Hawaiian rolls rise properly, ensure your yeast is fresh and activated. Proof the dough in a warm, draft-free area and allow it to rise for the recommended time. If your kitchen is cool, you can turn on your oven briefly to warm it and then turn it off before placing the dough inside to rise. You can also use a proofing box if you have one.
7. Can I use a bread machine to make gluten free Hawaiian rolls?
Yes, you can use a bread machine to make gluten free Hawaiian rolls, but be sure to select the gluten free setting on your machine. Follow the manufacturer’s instructions for adding ingredients, and be aware that the dough will be a little stickier than regular bread dough. You might need to shape the rolls by hand and then bake them in the oven for the best results.
Conclusion
There’s something truly special about homemade gluten free Hawaiian rolls – their soft, fluffy texture, sweet flavor, and versatility make them the perfect addition to any meal. Whether you’re enjoying them as a side dish, turning them into sliders, or pairing them with a refreshing salad, these rolls elevate every occasion. By following the tips and step-by-step guide in this article, you’ll be able to bake the best gluten free Hawaiian rolls at home, satisfying even the most discerning palates.
With a few simple ingredients and a little patience, you can bring the magic of these soft, sweet rolls into your kitchen. Gather your ingredients together, get ready to have some fun, and start baking your own treats! Your family and friends will love the delicious, gluten free creation you’ve made – and they’ll never miss the gluten! Happy baking!