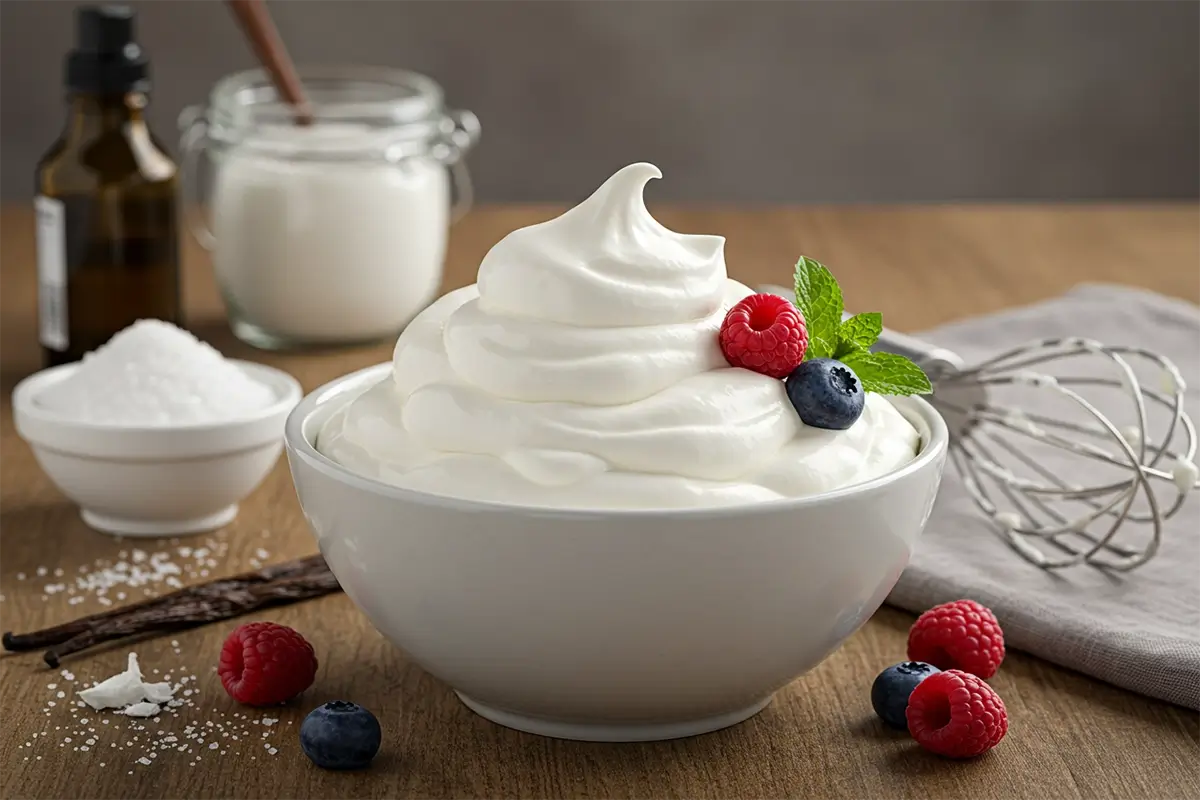
Imagine topping your favorite dessert or your morning coffee with a creamy, fluffy layer of whipped cream—without the guilt of extra sugar. For many, whipped cream is a delightful indulgence, but if you’re watching your sugar intake or following a low-carb or keto diet, traditional whipped cream just won’t cut it. That’s where sugar free whipped cream steps in, offering a sweet, rich finish without the sugar overload.
Whether you’re following a health-conscious lifestyle or simply looking for a way to enjoy your favorite treats without feeling guilty, this guide will walk you through everything you need to know about sugar free whipped cream. From understanding its benefits to learning how to make it at home, you’ll be able to enjoy a decadent yet guilt-free topping for any occasion.
Table of Contents
What Is Sugar Free Whipped Cream?
Sugar free whipped cream is exactly what it sounds like: whipped cream that contains no added sugar. Instead of traditional sweeteners, it relies on natural sugar substitutes, like stevia or monk fruit, to create that sweet, fluffy texture without the extra calories or carbs.
Benefits of Sugar Free Whipped Cream
- Lower in Calories: By omitting the sugar, sugar free whipped cream typically has far fewer calories than the original version.
- Better for Blood Sugar: If you’re managing your blood sugar levels, such as with diabetes, sugar free whipped cream provides a sweet treat without spiking your glucose levels.
- Versatile: It can be used in a wide variety of recipes—from topping your morning coffee to adding richness to desserts like cakes and pies.
- Diet-Friendly: Sugar free whipped cream is a fantastic option for those on keto, low-carb, or other sugar-restricted diets.
Why Choose Sugar Free Whipped Cream?
There are many reasons why sugar free whipped cream is a perfect alternative to the traditional version. Here’s a deeper look at why you might opt for this healthier version of a classic treat.
Health Considerations
If you’re managing diabetes, following a keto diet, or just looking to reduce sugar intake, sugar free whipped cream can be a game changer. Many sugar substitutes, like erythritol and monk fruit, have little to no impact on blood sugar levels, making them a safer choice for anyone watching their sugar consumption. This means you can still enjoy the fluffy indulgence without worrying about the sugar crash that usually follows.
Taste and Texture
One of the biggest concerns when making the switch to sugar free whipped cream is whether it can taste as good as the traditional kind. Fortunately, sugar free whipped cream can taste just as rich and creamy. With the right sweetener and a bit of vanilla extract, you can achieve a whipped cream that’s just as delightful as its sugary counterpart.
Versatility
Sugar free whipped cream isn’t just a topping for desserts. It’s incredibly versatile and can enhance your meals in many ways. Use it in coffee or hot chocolate, or even as a topping for fresh fruits or sugar free pies. The possibilities are endless, and it’s a simple way to elevate your dishes without adding unwanted sugar.
How to Make Sugar Free Whipped Cream at Home
Making sugar free whipped cream at home is surprisingly easy and takes just a few minutes. With only a handful of ingredients, you can whip up a delicious, healthy version of whipped cream that’s perfect for all your low-sugar desserts.
Ingredients You’ll Need
Here’s a quick look at what you’ll need to get started:
| Ingredient | Amount |
|---|---|
| Heavy Whipping Cream | 1 cup |
| Sugar Substitute (Stevia, Erythritol, Monk Fruit) | 1-2 tbsp (to taste) |
| Vanilla Extract (optional) | 1 tsp |
| Salt (optional) | A pinch |
Tip: The type of sweetener you choose will depend on your personal preference and dietary needs. Stevia, monk fruit, and erythritol are all popular options.
Step-by-Step Instructions
Now, let’s walk through the process of making sugar free whipped cream:
1. Chill Your Tools:
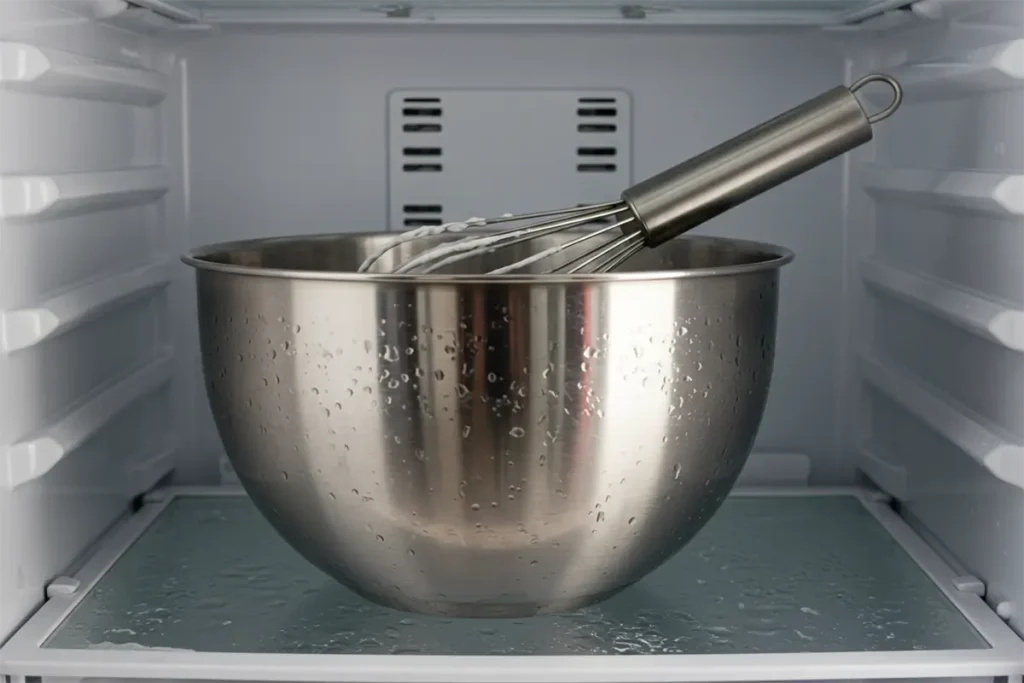
Chilling the tools you’re using is crucial for achieving the right texture when whipping cream. By chilling your mixing bowl and whisk (or beaters), you help the whipping cream stay cold while you’re mixing. Cold cream whips faster and more effectively because the fat in the cream begins to stiffen as it cools, allowing the air to be incorporated more easily. So, place the mixing bowl and whisk in the fridge or freezer for about 10 to 15 minutes before you begin. This small step will make a big difference in the final result.
2. Pour the Cream:
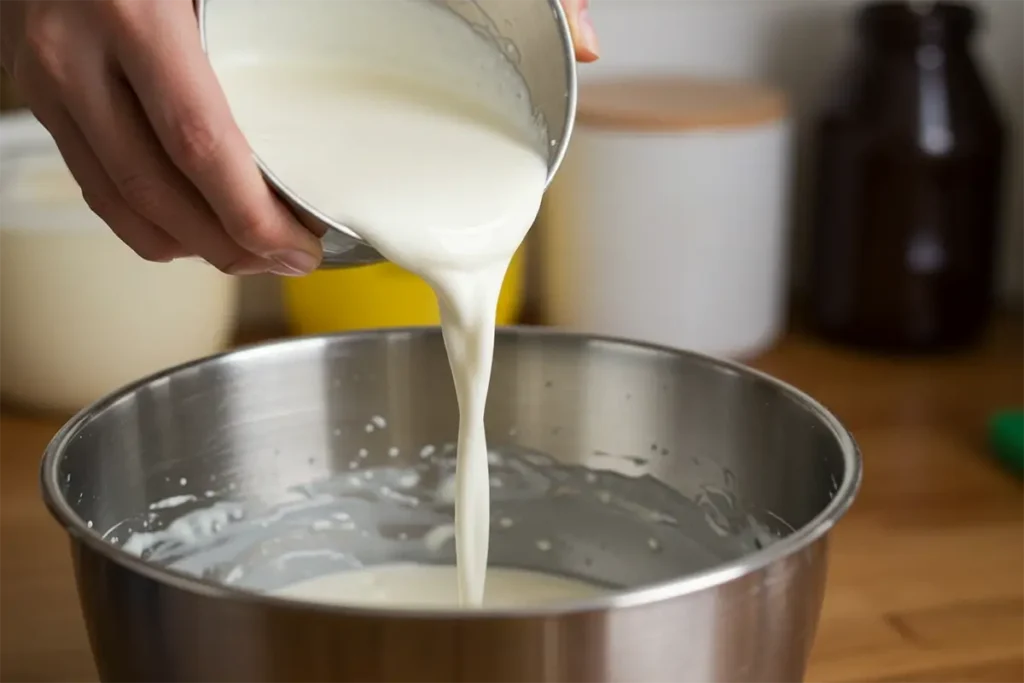
Once your tools are properly chilled, it’s time to pour 1 cup of heavy whipping cream into the bowl. Heavy cream is key because it contains a higher fat content (about 36%) than lighter creams, which is necessary to create the thick, fluffy texture of whipped cream. The colder your cream, the better the outcome, so it’s also important to keep the cream in the fridge until you’re ready to use it.
3. Add the Sweetener:
After the cream is in the bowl, it’s time to add your sugar substitute. Choose a sugar alternative that fits your dietary needs (such as stevia, monk fruit, or erythritol). Start with 1 tablespoon of sweetener. It’s important to add the sweetener gradually and taste as you go, because different sugar substitutes have varying levels of sweetness. Some are much sweeter than others, so adjusting the quantity based on your personal preference will ensure the whipped cream isn’t too sweet or too bland.
4. Whisk it Up:
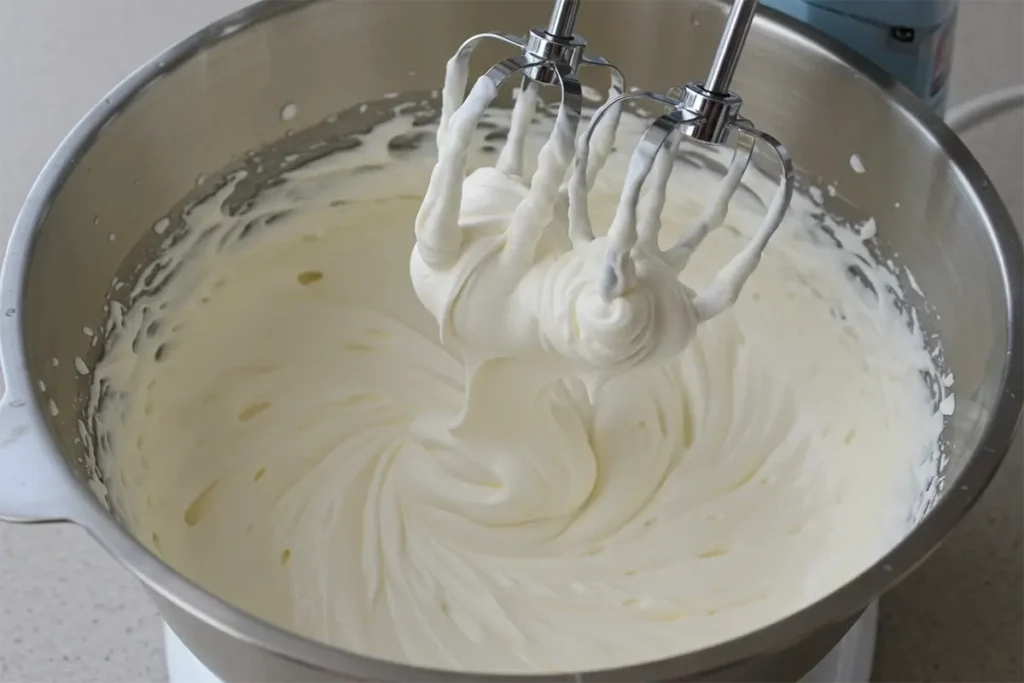
Now, grab your electric mixer and set it to medium-high speed. Begin whisking the cream and sweetener mixture. The cream will start to thicken after a few minutes, so keep an eye on it. This process typically takes about 3 to 5 minutes. The key indicator that you’re on the right track is when the cream begins to form soft peaks. Soft peaks are when the cream holds its shape but still droops over slightly when the whisk is lifted. This texture is the point just before it reaches stiff peaks, so it’s important to watch carefully to avoid overwhipping.
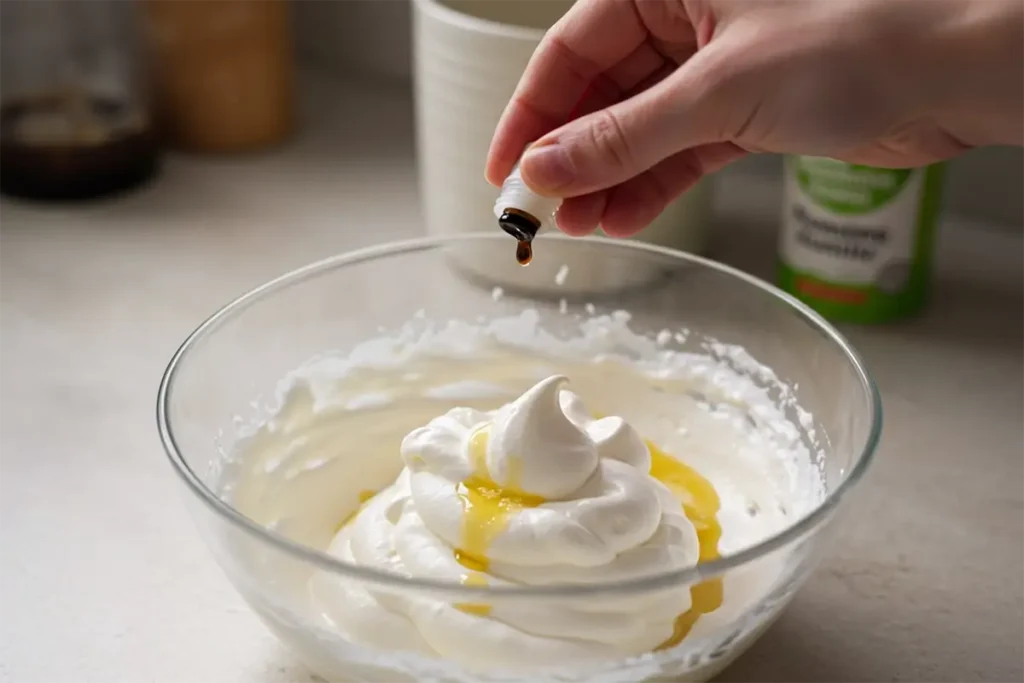
5. Finish It Off:
Once soft peaks have formed, you can add flavor enhancers like vanilla extract for a rich, sweet flavor. You can also add a pinch of salt—this is optional but recommended, as salt enhances the overall sweetness and helps balance the flavors. After adding the vanilla and salt, continue whisking for another 30 seconds to 1 minute, or until you reach stiff peaks. Stiff peaks are when the whipped cream holds its shape completely, and the peaks stay upright when the whisk is lifted. Be careful not to overwhip it at this stage, as this can turn the whipped cream into butter.
6. Serve Immediately or Store:
Once the whipped cream is ready, you can use it right away as a topping for your favorite desserts, coffee, or fruit. If you’re not serving it immediately, transfer it into an airtight container and store it in the fridge. It should keep well for up to 2 to 3 days. Before serving again, you may need to give it a quick whisk to bring back the fluffiness, as it can deflate slightly while stored.
By following these simple but effective steps, you’ll have homemade sugar free whipped cream ready in no time—perfect for any low-sugar, keto, or diabetes-friendly treat!
Tips for Perfect Sugar Free Whipped Cream
Achieving the perfect sugar free whipped cream doesn’t require much more than the right technique. Here are a few extra tips to help you get the best results:
- Don’t Overwhip: It’s important to stop whisking once stiff peaks form. If you whisk too long, you’ll end up with butter instead of whipped cream!
- Adjust Sweetness: Everyone’s taste buds are different, so experiment with different sugar substitutes to find the one that works best for you. Erythritol has a mild flavor, while stevia can sometimes have a slight aftertaste.
- Make it Dairy-Free: If you’re following a dairy-free or vegan diet, you can use coconut cream as an alternative to heavy whipping cream. The result is a dairy-free, sugar free whipped topping.
Creative Ways to Use Sugar Free Whipped Cream
Now that you know how to make sugar free whipped cream, let’s explore the many ways you can incorporate it into your meals and desserts.
In Desserts
- Topping for Sugar Free Pies: Sugar free whipped cream is a fantastic topping for sugar free pies like pumpkin or key lime.
- Parfaits: Layer it with sugar free yogurt, berries, or granola to make a healthy parfait that satisfies your sweet tooth.
- Sugar Free Cakes: Use sugar free whipped cream as a filling or topping for low-sugar or gluten free cakes and cupcakes.
In Beverages
- Coffee and Lattes: Top off your morning coffee, iced coffee, or latte with a dollop of sugar free whipped cream for an indulgent touch.
- Hot Chocolate: Nothing beats a warm cup of hot chocolate topped with a swirl of whipped cream.
- Milkshakes and Smoothies: Add sugar free whipped cream on top of milkshakes or smoothies for extra richness.
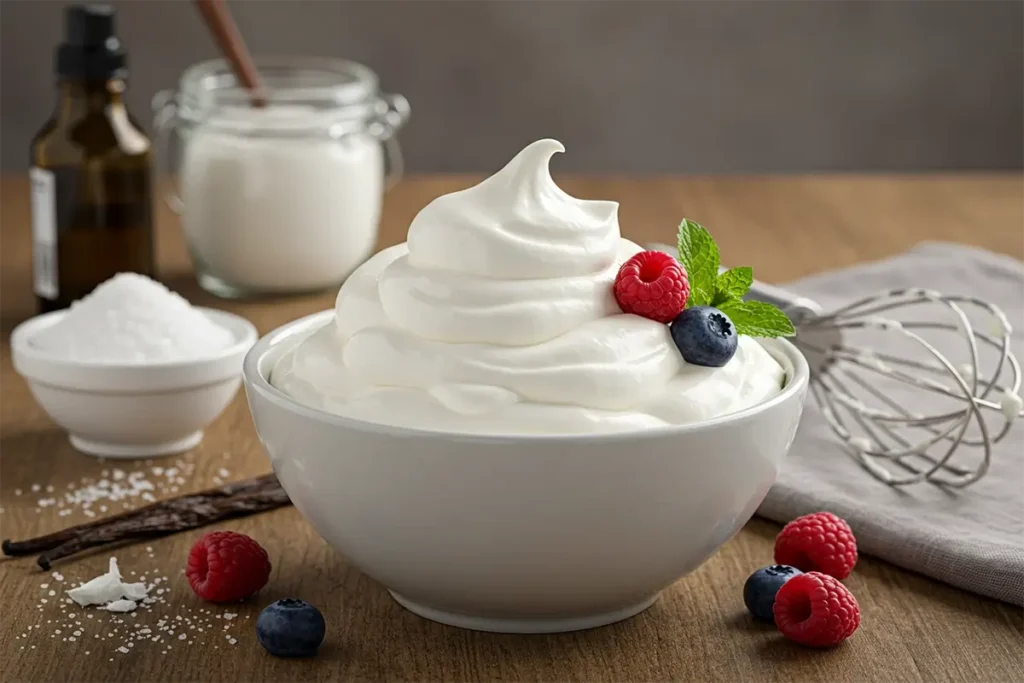
As a Topping for Fruits
If you’re craving something light but sweet, fresh fruit with a dollop of sugar free whipped cream is a perfect combination. Try it with strawberries, blueberries, or a mixed fruit salad for a refreshing and low-sugar dessert.
Common Questions About Sugar Free Whipped Cream
Can You Make Sugar Free Whipped Cream Ahead of Time?
Yes! You can prepare sugar free whipped cream ahead of time and store it in the fridge. Just make sure to store it in an airtight container to keep it fresh for up to 2-3 days. If it deflates a bit, simply rewhisk it for a few seconds before serving.
What’s the Best Sweetener to Use for Sugar Free Whipped Cream?
The best sweetener depends on your personal preference. Stevia is a popular choice, but some people prefer erythritol or monk fruit because they don’t leave a bitter aftertaste. If you’re unsure, try experimenting with a few different types to see which one suits your taste best.
Can Sugar Free Whipped Cream Be Used in Baking?
While it’s not ideal for every baking recipe, sugar free whipped cream can certainly be used as a topping or filling in low-sugar cakes, cupcakes, and pastries. It’s perfect for creating a lighter alternative to traditional frosting.
Conclusion
Sugar free whipped cream is the perfect indulgence without the guilt. Whether you’re topping your favorite desserts or adding a creamy finish to your morning coffee, sugar free whipped cream allows you to enjoy the rich texture and sweetness without any of the sugar overload. With just a few simple ingredients and a little know-how, you can create this delicious topping at home and enjoy it whenever you like.
So, what are you waiting for? Try making your own sugar free whipped cream today and elevate your meals, beverages, and desserts without compromising your health goals.
Ready to start making your own sugar free whipped cream? Give it a try and let us know how it turned out in the comments below!